This QuickStart demonstrates how to use the Sigma REST API to programmatically manage embedded analytics within a custom host application. You'll learn how to provision users, retrieve available workbooks, and generate dynamic embed URLs for workbooks, pages, and individual elements.
By the end of this QuickStart, you'll have two working examples that integrates seamlessly with Sigma's embedding framework, giving you fine-grained control over the embedded experience through API calls and user selections.
For more information on Sigma's product release strategy, see Sigma product releases
If something doesn't work as expected, here's how to contact Sigma support
Target Audience
Developers who want to use Sigma's REST API to programmatically control Sigma in an embedded context.
Prerequisites
- A computer with a current browser. It does not matter which browser you want to use.
- Access to your Sigma environment.
- Some familiarity with Sigma is assumed. Not all steps will be shown, as basic Sigma usage is assumed.
- Microsoft VS Code or another suitable development tool.
- Node version 18+ and related dependencies.

Clone the Git Repository Project Folder
Sample project code is available in a public GitHub repository to save time.
While you can clone the entire repository, we recommend avoiding parts that aren't immediately relevant.
Instead, we'll use VS Code and the terminal to perform a sparse-checkout of the specific project folder we are interested in. This involves a few extra steps but results in a cleaner local project folder.
Open VSCode and start a new Terminal session.
Create a new directory in your preferred location using:
mkdir sigma_quickstarts
Change to the new directory:
cd sigma_quickstarts
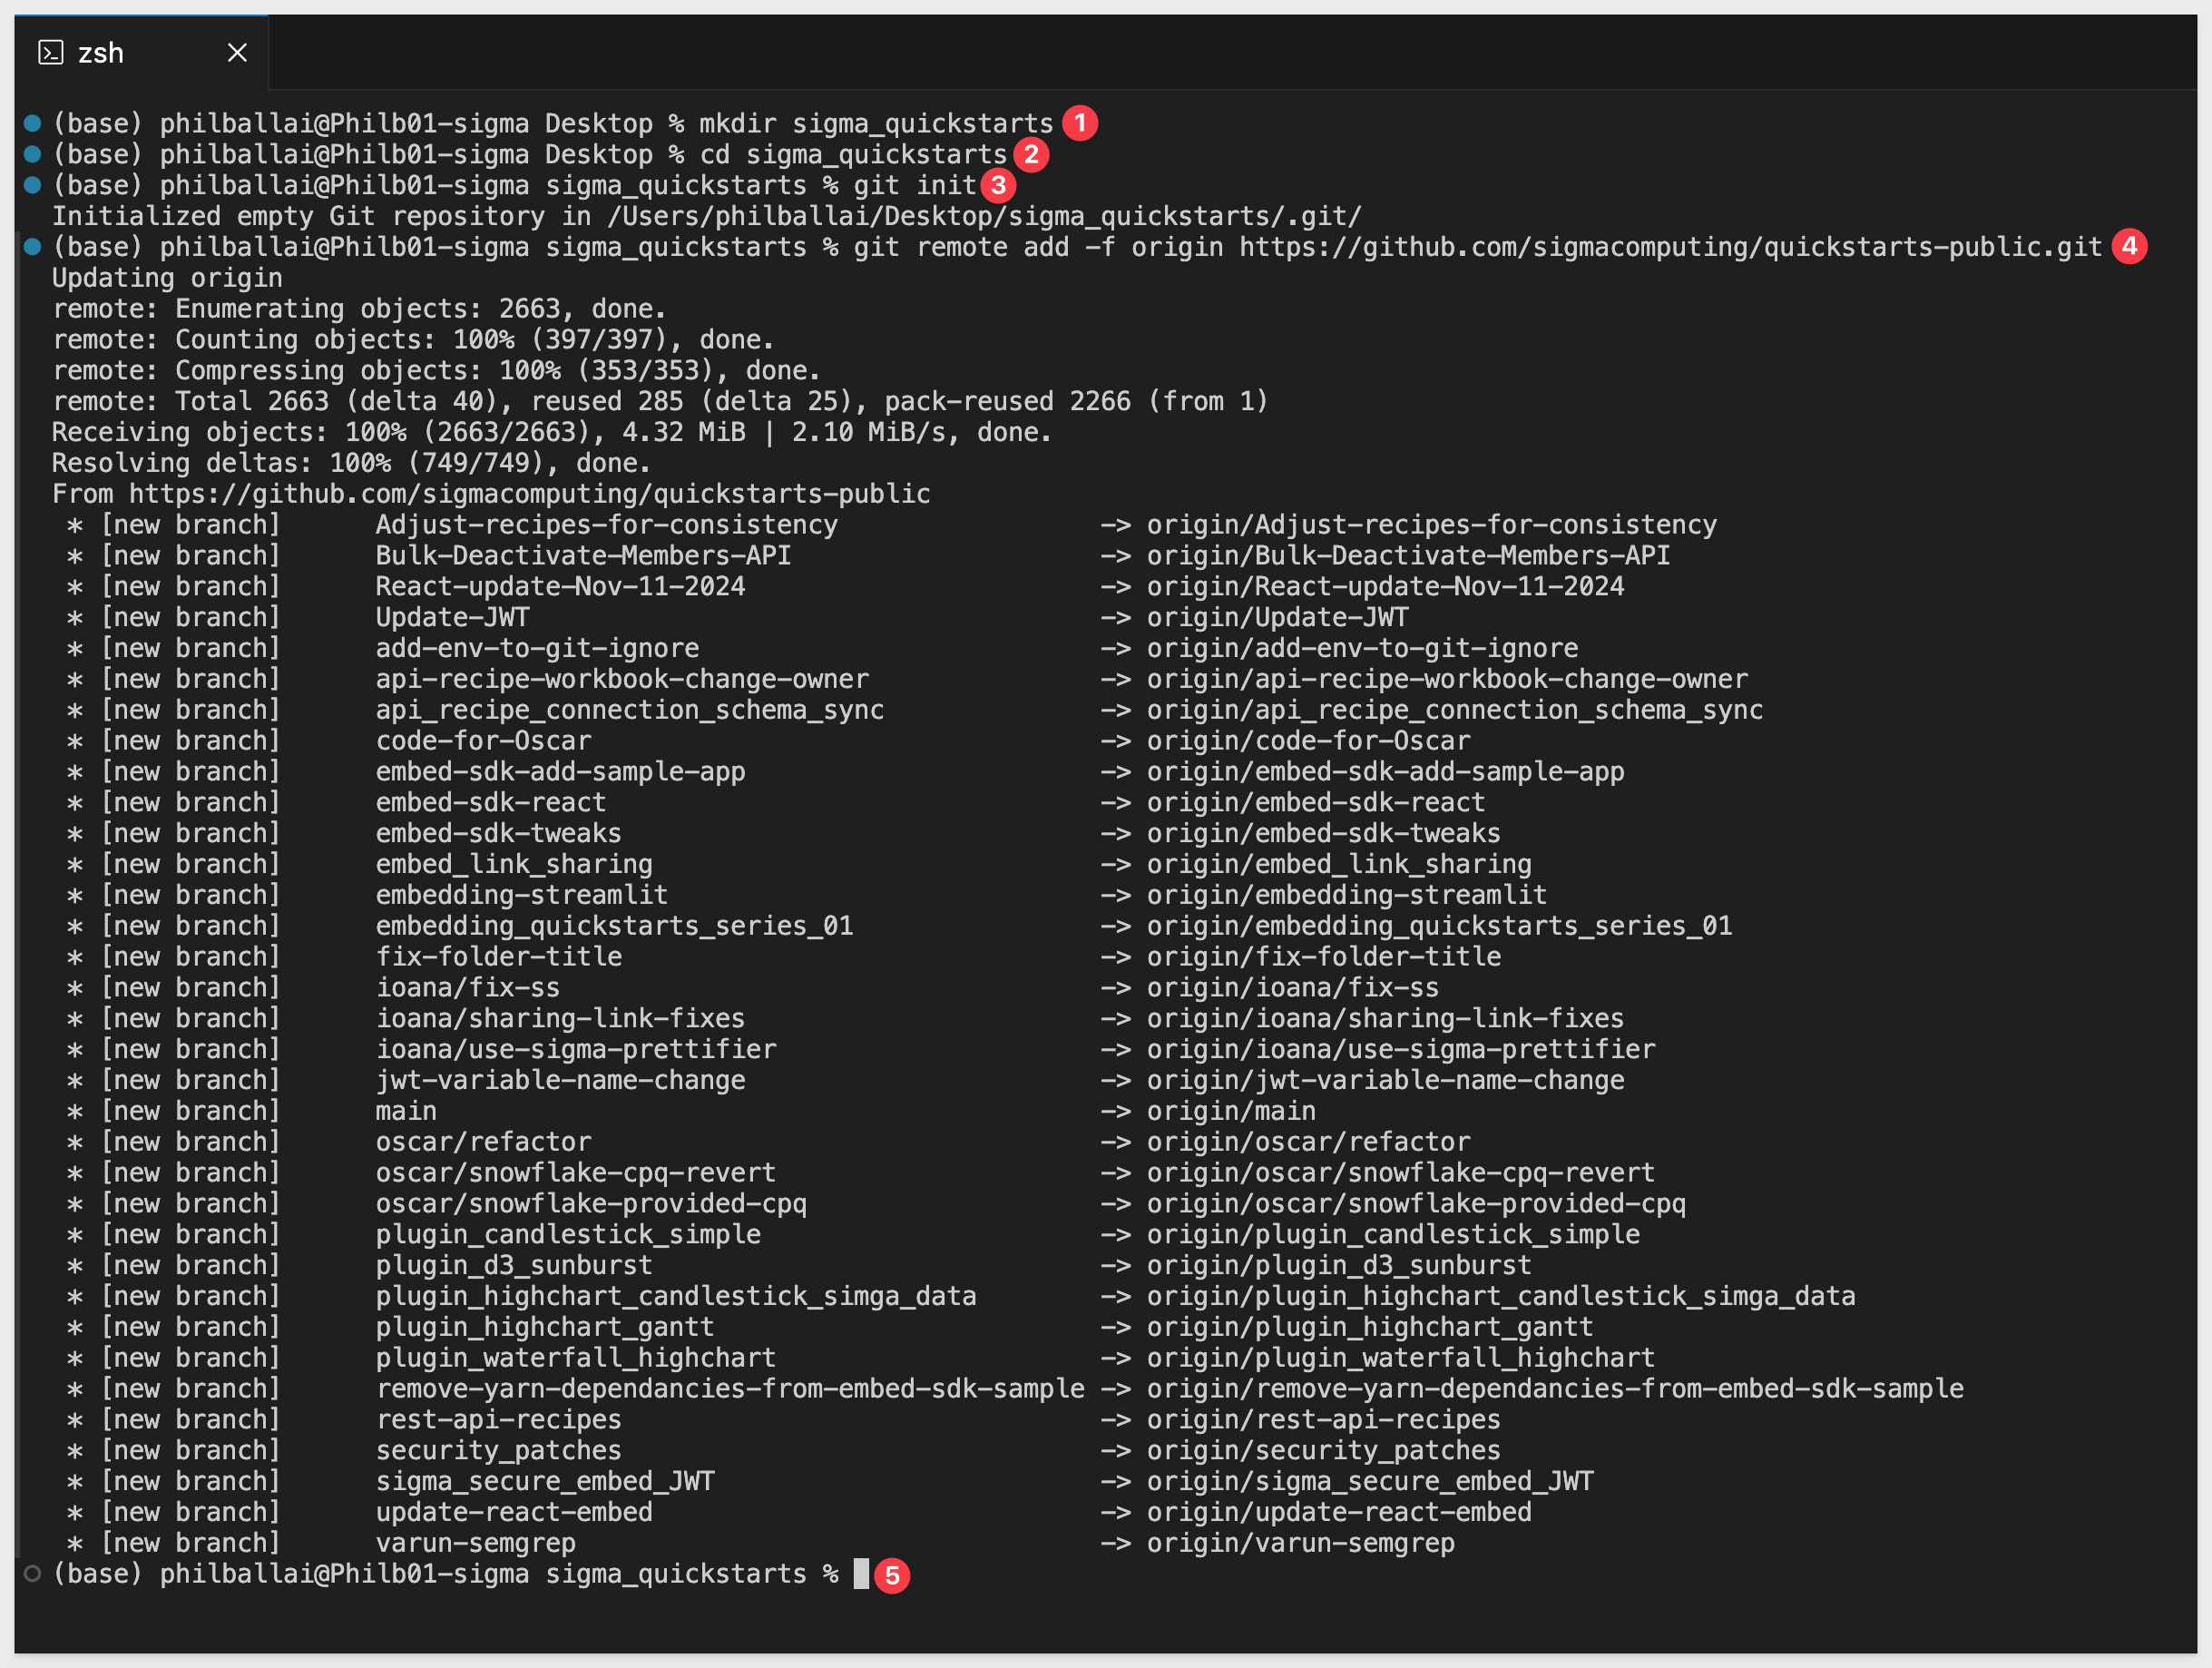
Execute the terminal command:
git init
Add the remote repository as the origin:
git remote add -f origin https://github.com/sigmacomputing/quickstarts-public.git
You shouldn't see any errors:
Enable sparse checkout:
git config core.sparseCheckout true
Specify the folder you want to clone by adding it to the sparse-checkout configuration:
echo "embedding_qs_series_2_api_use_cases" >> .git/info/sparse-checkout
Pull the specified folder from the repository:
git pull origin main
Change directory to the new folder:
cd embedding_qs_series_2_api_use_cases
Finally, install project dependencies using npm:
npm install
After the command runs, click the button to Open Folder:

Use the folder navigation to locate your project folder and click Open.
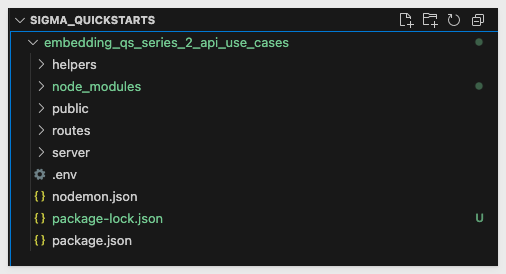
We should now see the project called SIGMA_QUICKSTARTS with a folder called embedding_qs_series_2:
Additional node.js packages
We need to install two Node.js packages that provide helpful development utilities.
1: jsonwebtoken
We use this package to decode a JWT in the VSCode terminal. This lets us inspect the token's payload and header without verifying its authenticity. This is helpful when you need to inspect the information embedded in the token for non-secure contexts or for inspection/debugging purposes.
2: nodemon:
This package is a development tool that automatically restarts our Node.js application whenever it detects changes in specific code files. This streamlines development by automatically restarting the server after each code change.
To install these two packages, open a new terminal window in VSCode in the project folder.
Run the command:
npm install jsonwebtoken nodemon
The project has almost everything we need, but we will need set up some things in Sigma that will be used throughout this QuickStart Embed API series.
Client Credentials
Client credentials (a unique client ID and embed secret) are the foundation of secure embedding.
Sigma uses the client ID to determine which embed secret is referenced in a request. Each time a request is made, the server-side embed API uses the embed secret to generate an encrypted signature.
Together, the client ID and embed secret create a robust security framework for server-side interactions with Sigma.
Navigate to Administration and scroll down to Developer Access.
Click Create New:

In the Create client credentials modal, select both the REST API and Embedding checkboxes, provide a name, and assign an administrative user as the owner:
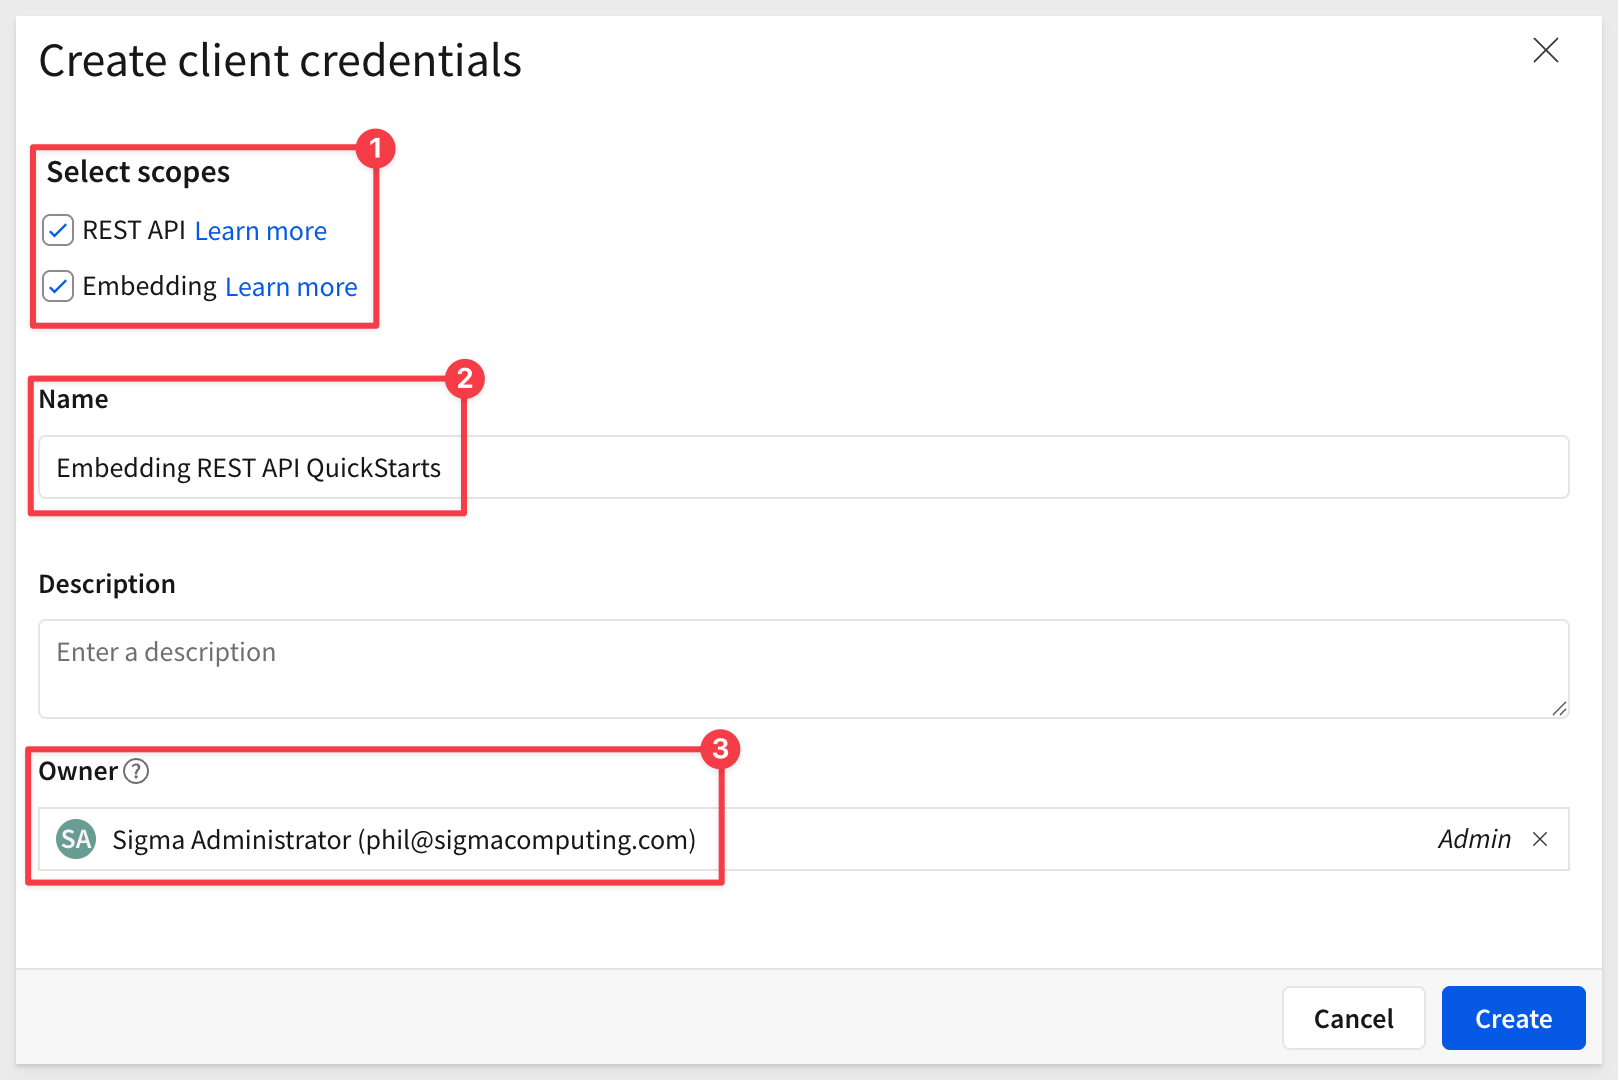
Click Create.
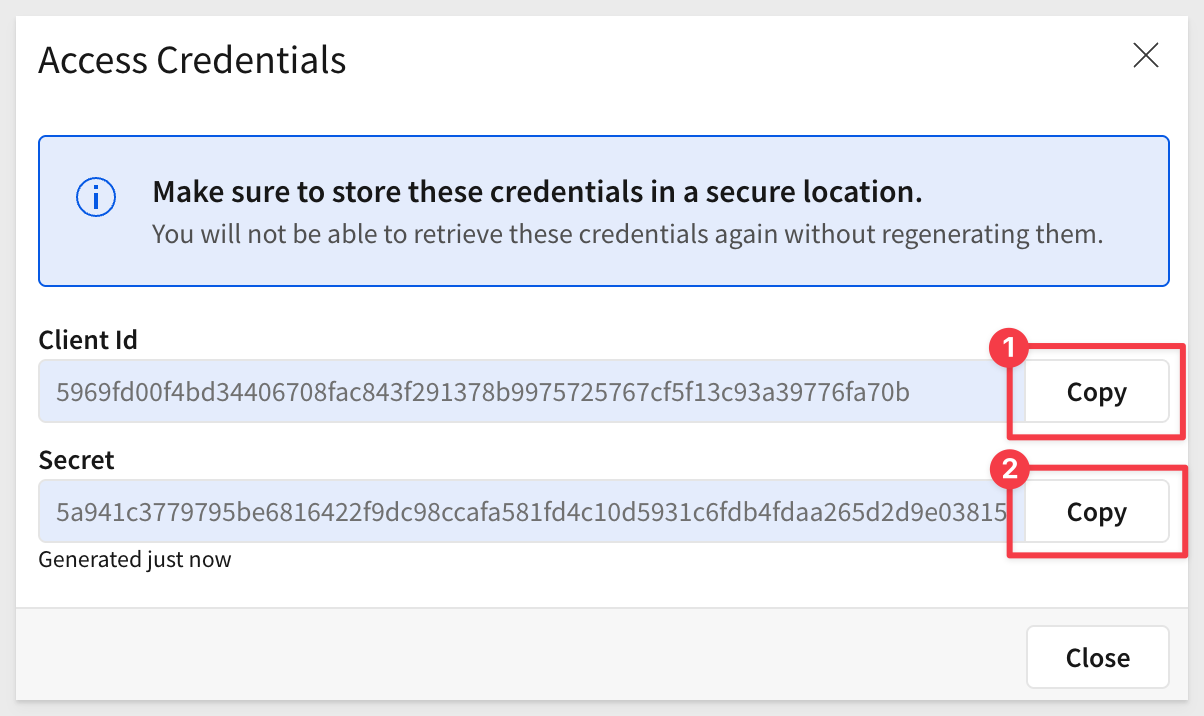
Copy and paste the Client ID and Secret into the respective locations in the .env file, in the Sigma API Credentials grouping.
While we are here, update the value for ADMIN_EMAIL with your Sigma admin email address. We will use this when we provision two new embed users by API later.
Also update the value for ORG_SLUG with your value. The org_slug is the organization name for your Sigma instance. It will be the text immediately after the https://app.sigmacomputing.com/ url in the browser.
For example, if the url is https://app.sigmacomputing.com/quick-starts-fundamentals the org_slug is quick-starts-fundamentals/
For more information, see Identify your API request URL
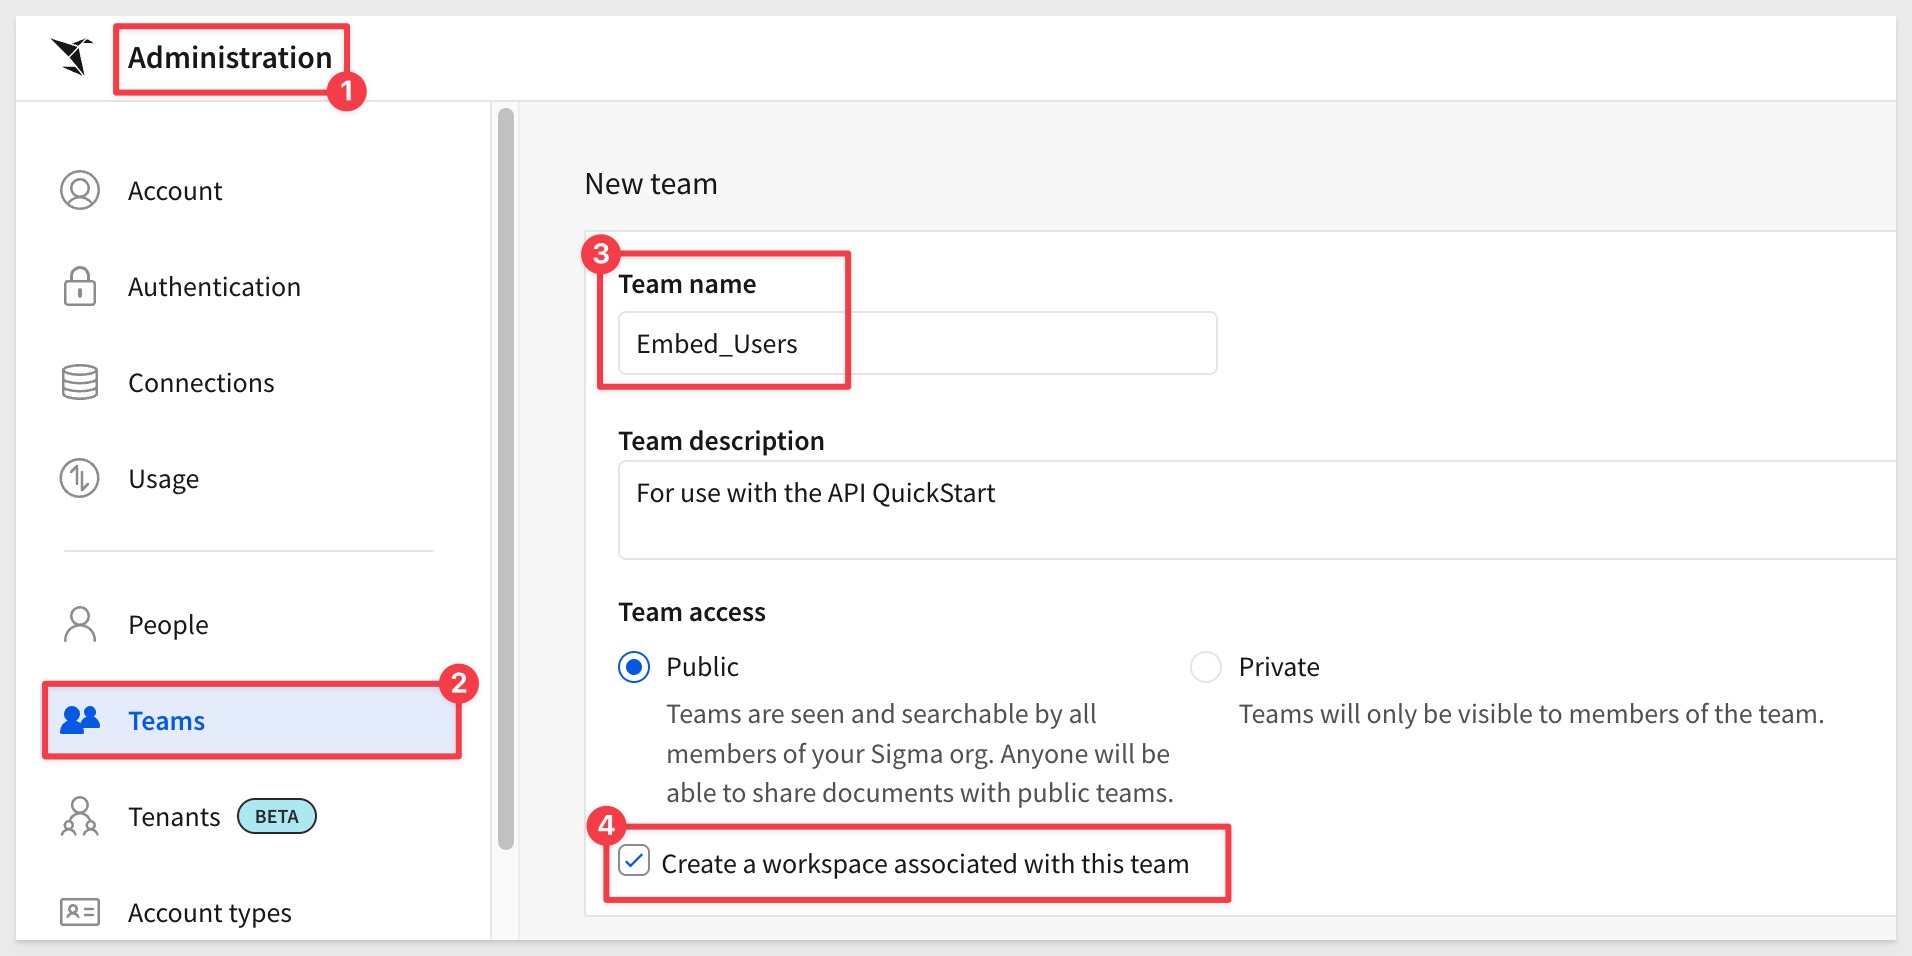
Teams
Next, we'll create a team and share the workbook with this team. Then the host application will pass Sigma that team when accessing Sigma content, along with other information about the user.
Create a team Embed_Users and check the box to also create a workspace:
Test users
We will use two users to test different personas in the embedding API QuickStarts. In a Sigma trial account, you will already have an administrative user and the other two will be created by a provisioning process provided as part of this project's code.
Here are the details for our test users:
Persona Name | Role | Providing | |
View | view.embed.qs@example.com | View | Read-only — restricted capabilities |
Build | build.embed.qs@example.com | Build | Can create/edit workbooks etc. |
This setup demonstrates the most common functionality.
The initial .env file from the git repo should already have two users preconfigured for you:
# -----------------------------------------------------------------------------
# Provisioning Feature
# -----------------------------------------------------------------------------
VIEW_EMAIL=view.embed.qs@example.com
VIEW_ACCOUNT_TYPE=View
VIEW_TEAMS=Embed_Users

BUILD_EMAIL=build.embed.qs@example.com
BUILD_ACCOUNT_TYPE=Build
BUILD_TEAMS=Embed_Users
For more information, see Configure access to your embedded content authenticated with JWTs
Embed user provisioning
To keep this "quick", we have provided a provisioning page that uses the REST API to add two embed users mentioned in the last section.
Once added, we can use them in the host application, polling the .env file at runtime for the selected users' details.
Return to VSCode and make sure the .env file has all the required values.
Open a new terminal session (or use the one still open).
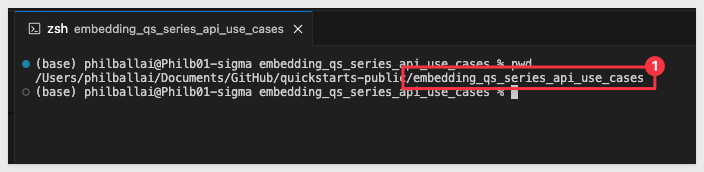
Ensure you are in the project folder:
pwd
Once in the correct folder, we can start the web server with: debugging enabled:
DEBUG=true npm start
Detailed debug information is provided when DEBUG=true is enabled and the expected result is:
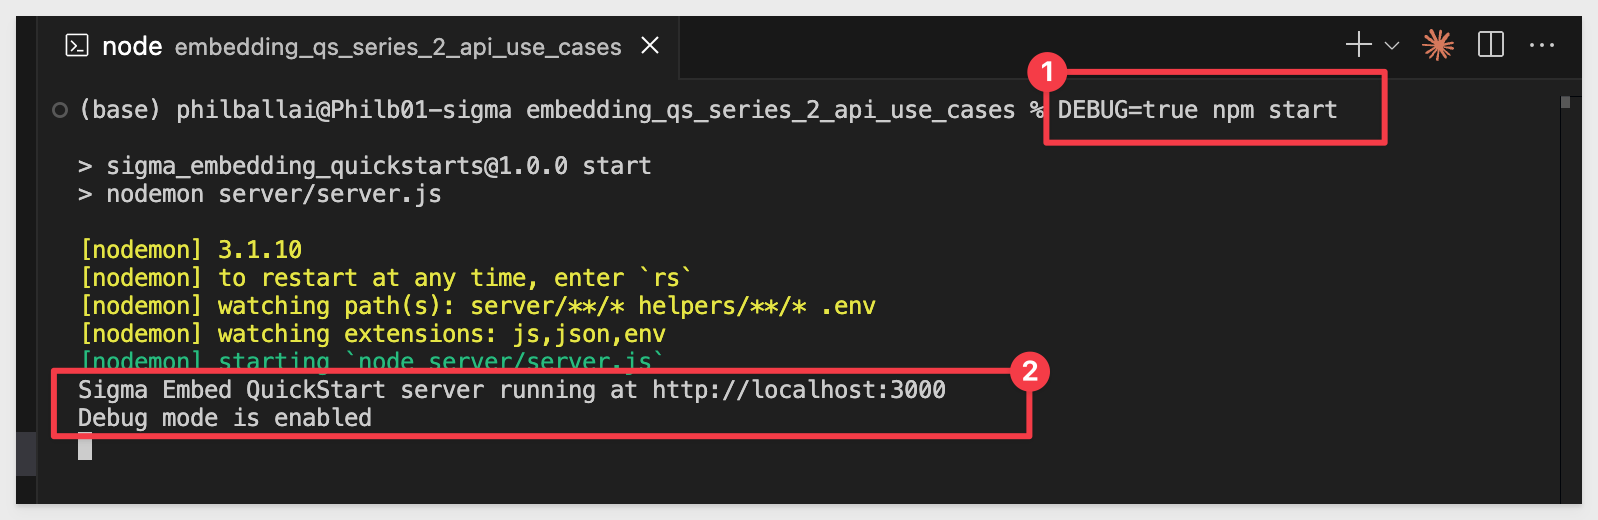
Once the server is running, we can browse to a preconfigured provisioning page. This page adds our two embed test users and displays the memberId for each, along with the admin user specified in .env (based on the provided email address):
Browse to:
http://localhost:3000/tools/preload-users.html
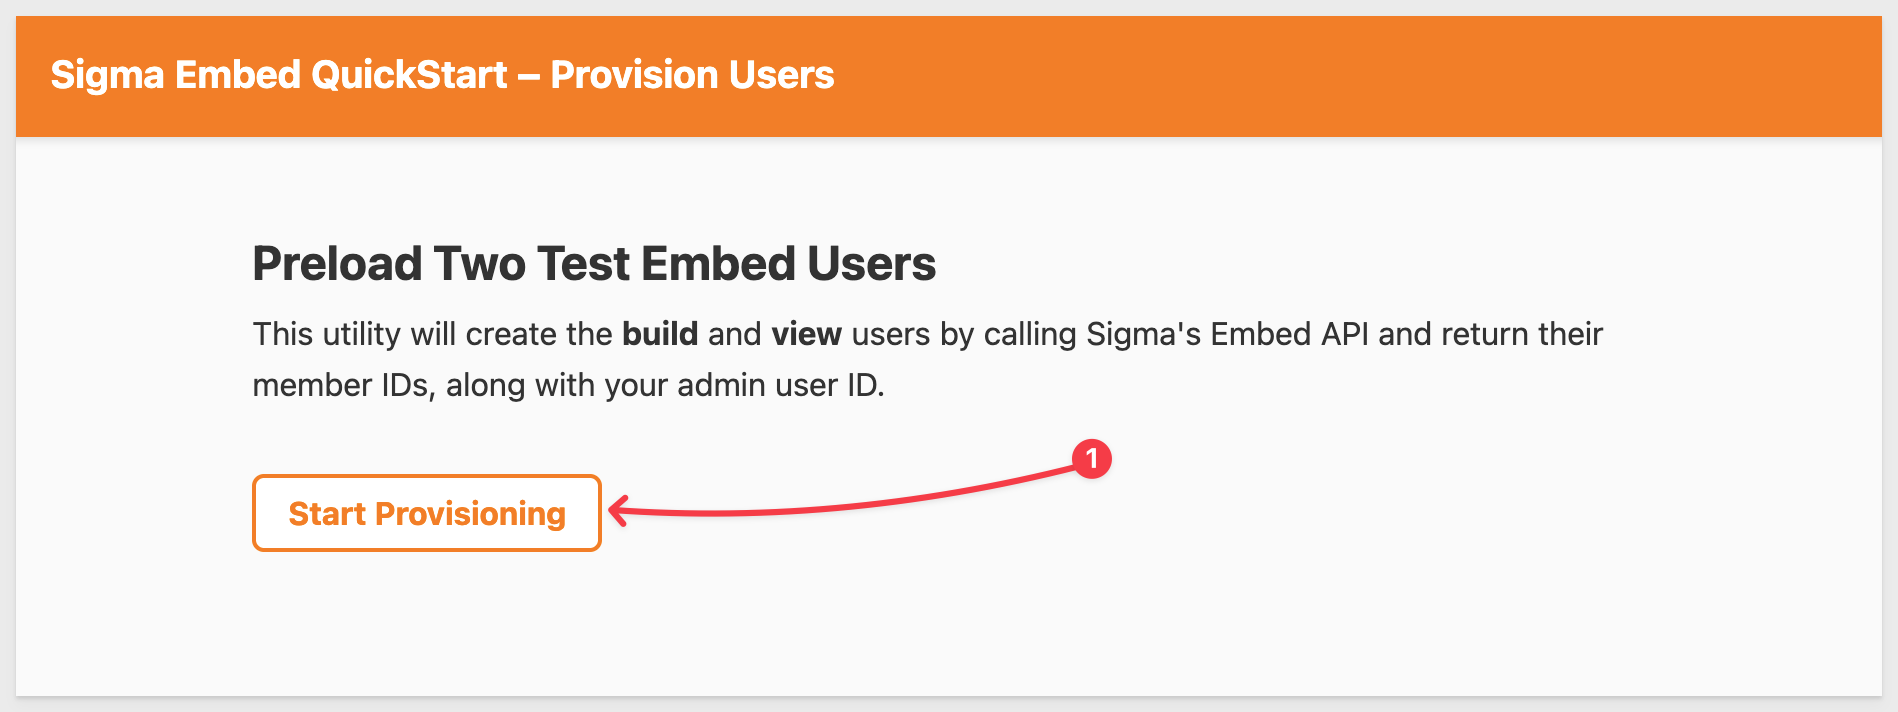
Click Start Provisioning.
Once done, the page will respond with a summary:
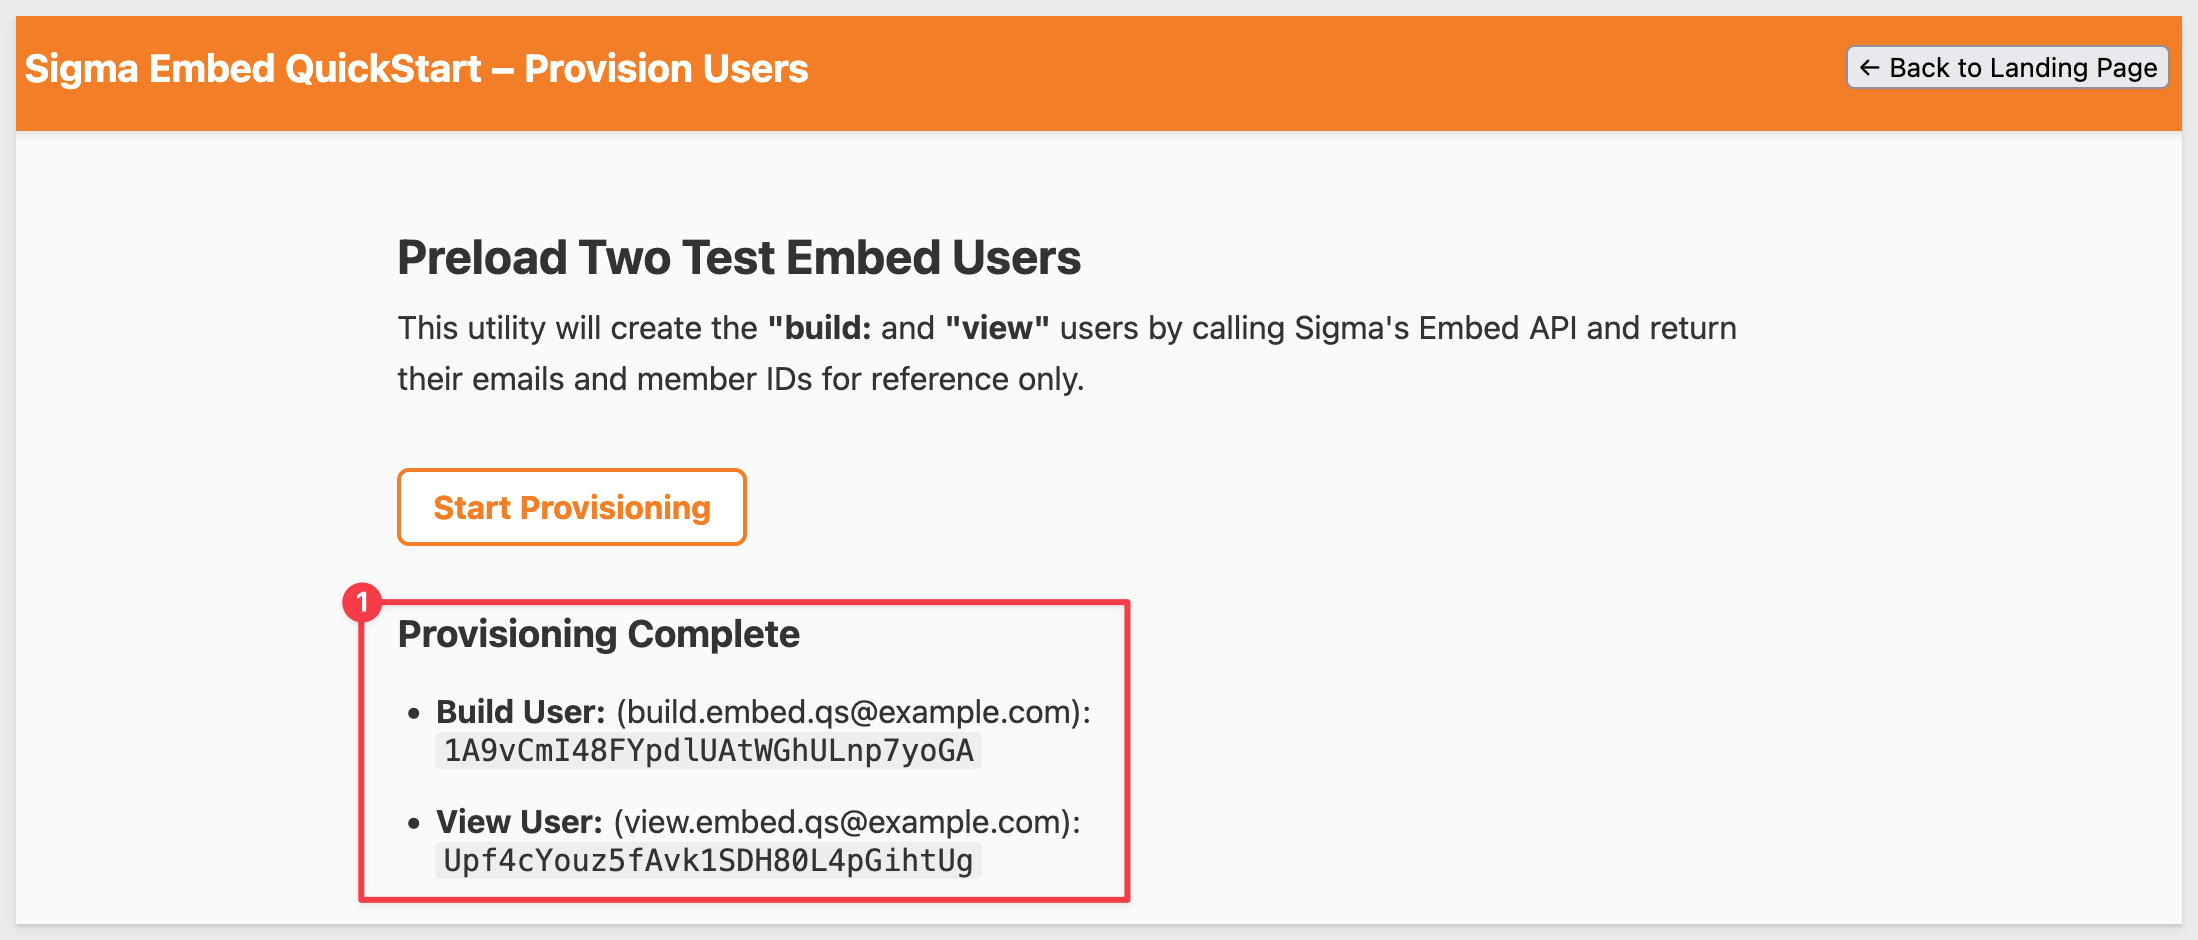
If an error occurs, check the console log for more information on the error.
Once the test users are created, we don't need to run the provisioning again unless we want to add more test users.
Click the Back to Landing Page button.
Create Content to Embed
We need to create a few things in Sigma to embed into our host application. We will keep that part simple as that is not the focus of this QuickStart.
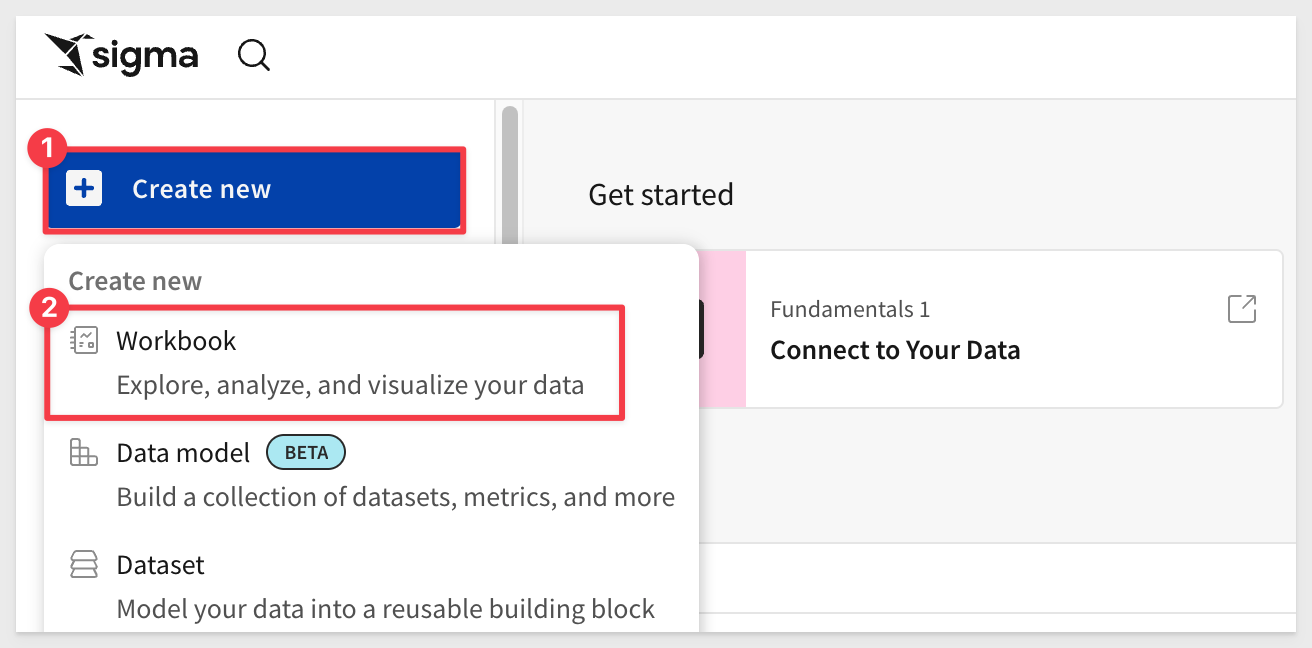
In Sigma, return to the homepage and click the + Create new button and click Workbook:
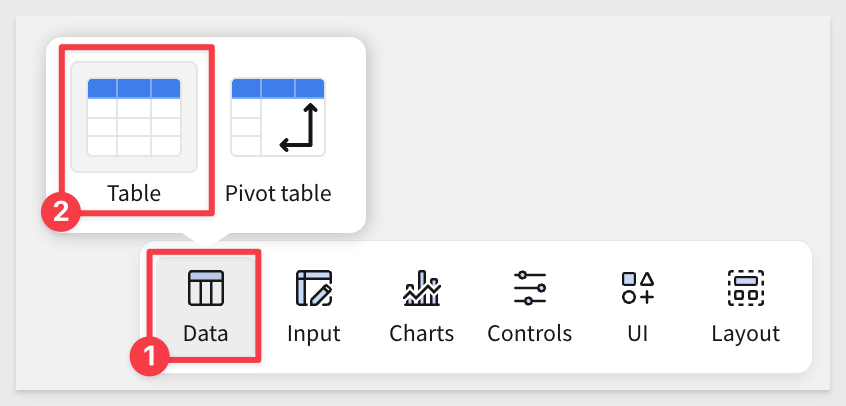
Drag a new Table from the Data group on the Element bar:
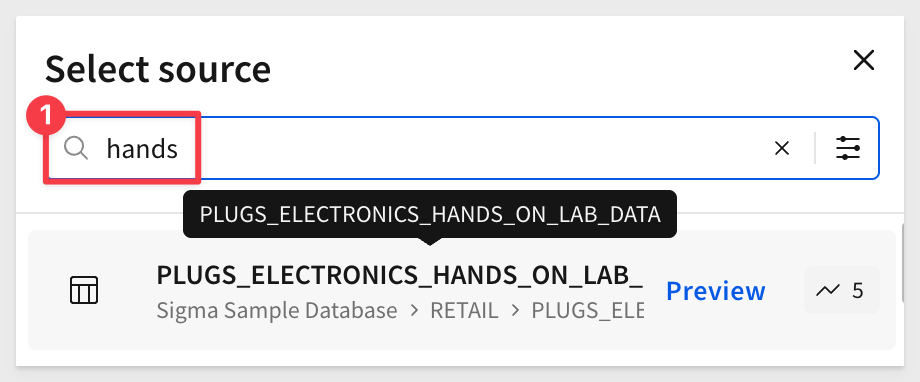
Click Select source
Sigma allows users to search for tables by name; type hands in the search bar and select the PLUGS_ELECTRONICS_HANDS_ON_LAB_DATA table from the RETAIL schema:
This opens the selected table in a new, unsaved workbook named Exploration:

We can rename the table by double-clicking on the table name and changing it to Plugs_Sales_Transactions.
Add a Chart as a child element of the table and configure it as shown below:

Optionally, the table can be filtered to show less rows using Top N, just to make the table load as fast as possible.
Also add a new Page to the workbook and add a Text element, setting the text to PAGE 2:
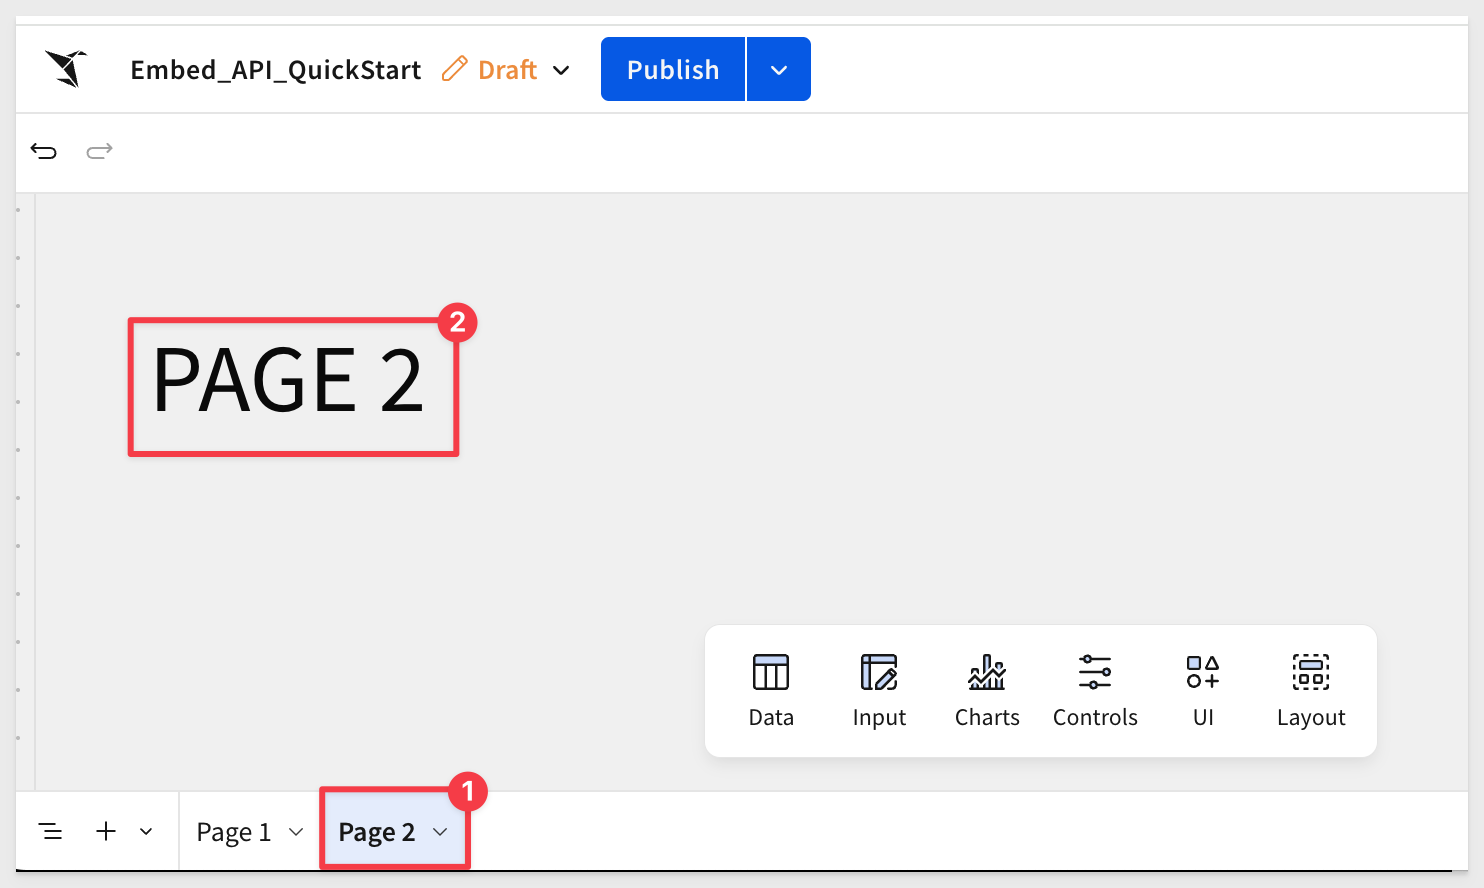
This gives us a workbook with two pages and three elements.
Click the Save as button and save the workbook Embed_API_QuickStart in the Embed_Users workspace.
So we have two workbooks in our workspace, save another copy in the workspace using the name Embed_API_QuickStart (copy):

The content being the same doesn't matter, we just want to ensure both workbooks are available to embed users.
Share the Workbooks
Share both workbooks as shown below, changing the permission level to Edit:

This grants any member of the team access and we'll will adjust the permission level using the Account Type JWT claim at runtime.
This will allow the View user to look at the workbook and do some very basic things like sort and filter. The Build user will have full edit permission.
For more information in Sigma default account types, see Default account types
We last left the browser open the main landing page. If for some reason it all got closed, simply restart it.
Restart it as shown earlier, ensuring you're in the correct project folder:
DEBUG=true npm start
The server is ready when it displays Server listening at http://localhost:3000.
Browse to the landing page:
http://localhost:3000
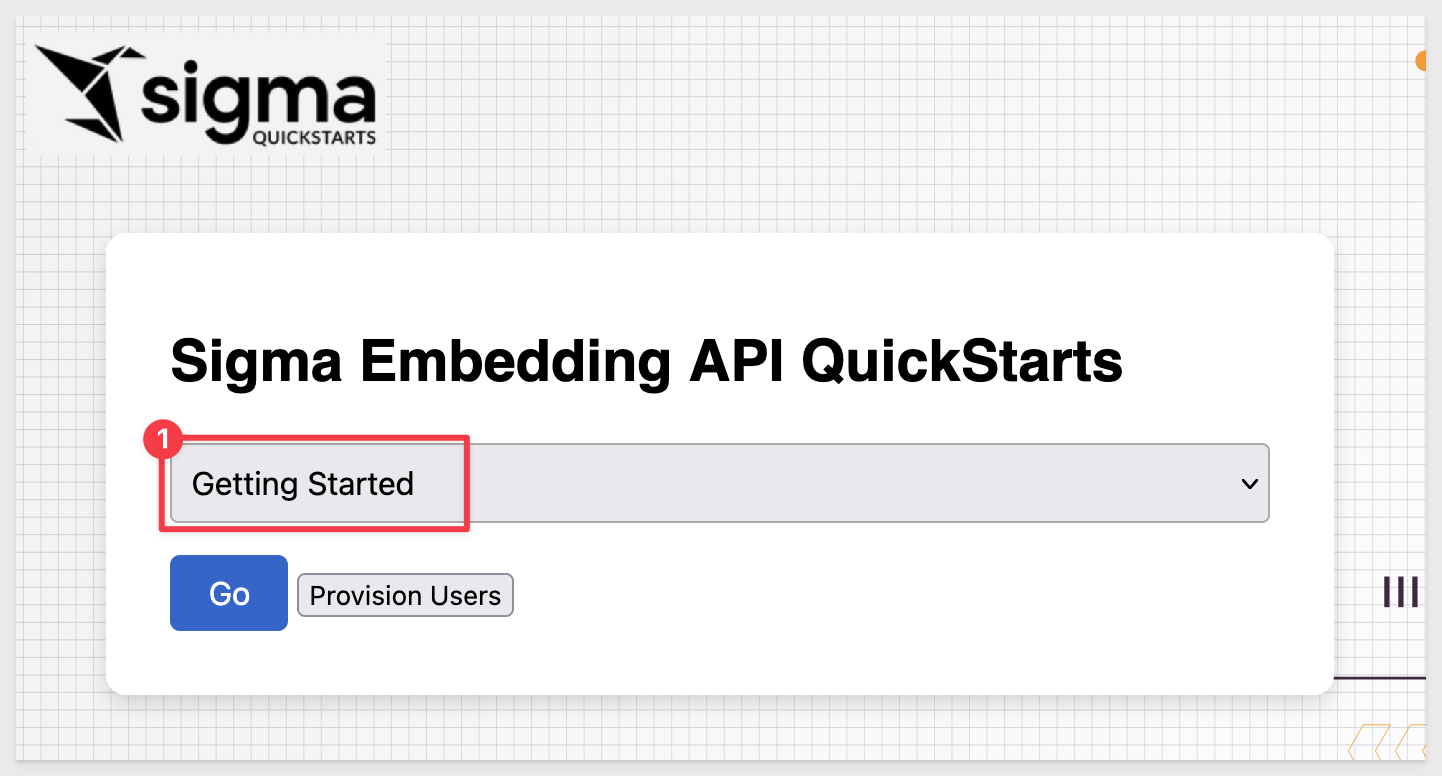
Select Getting Started and click Go:
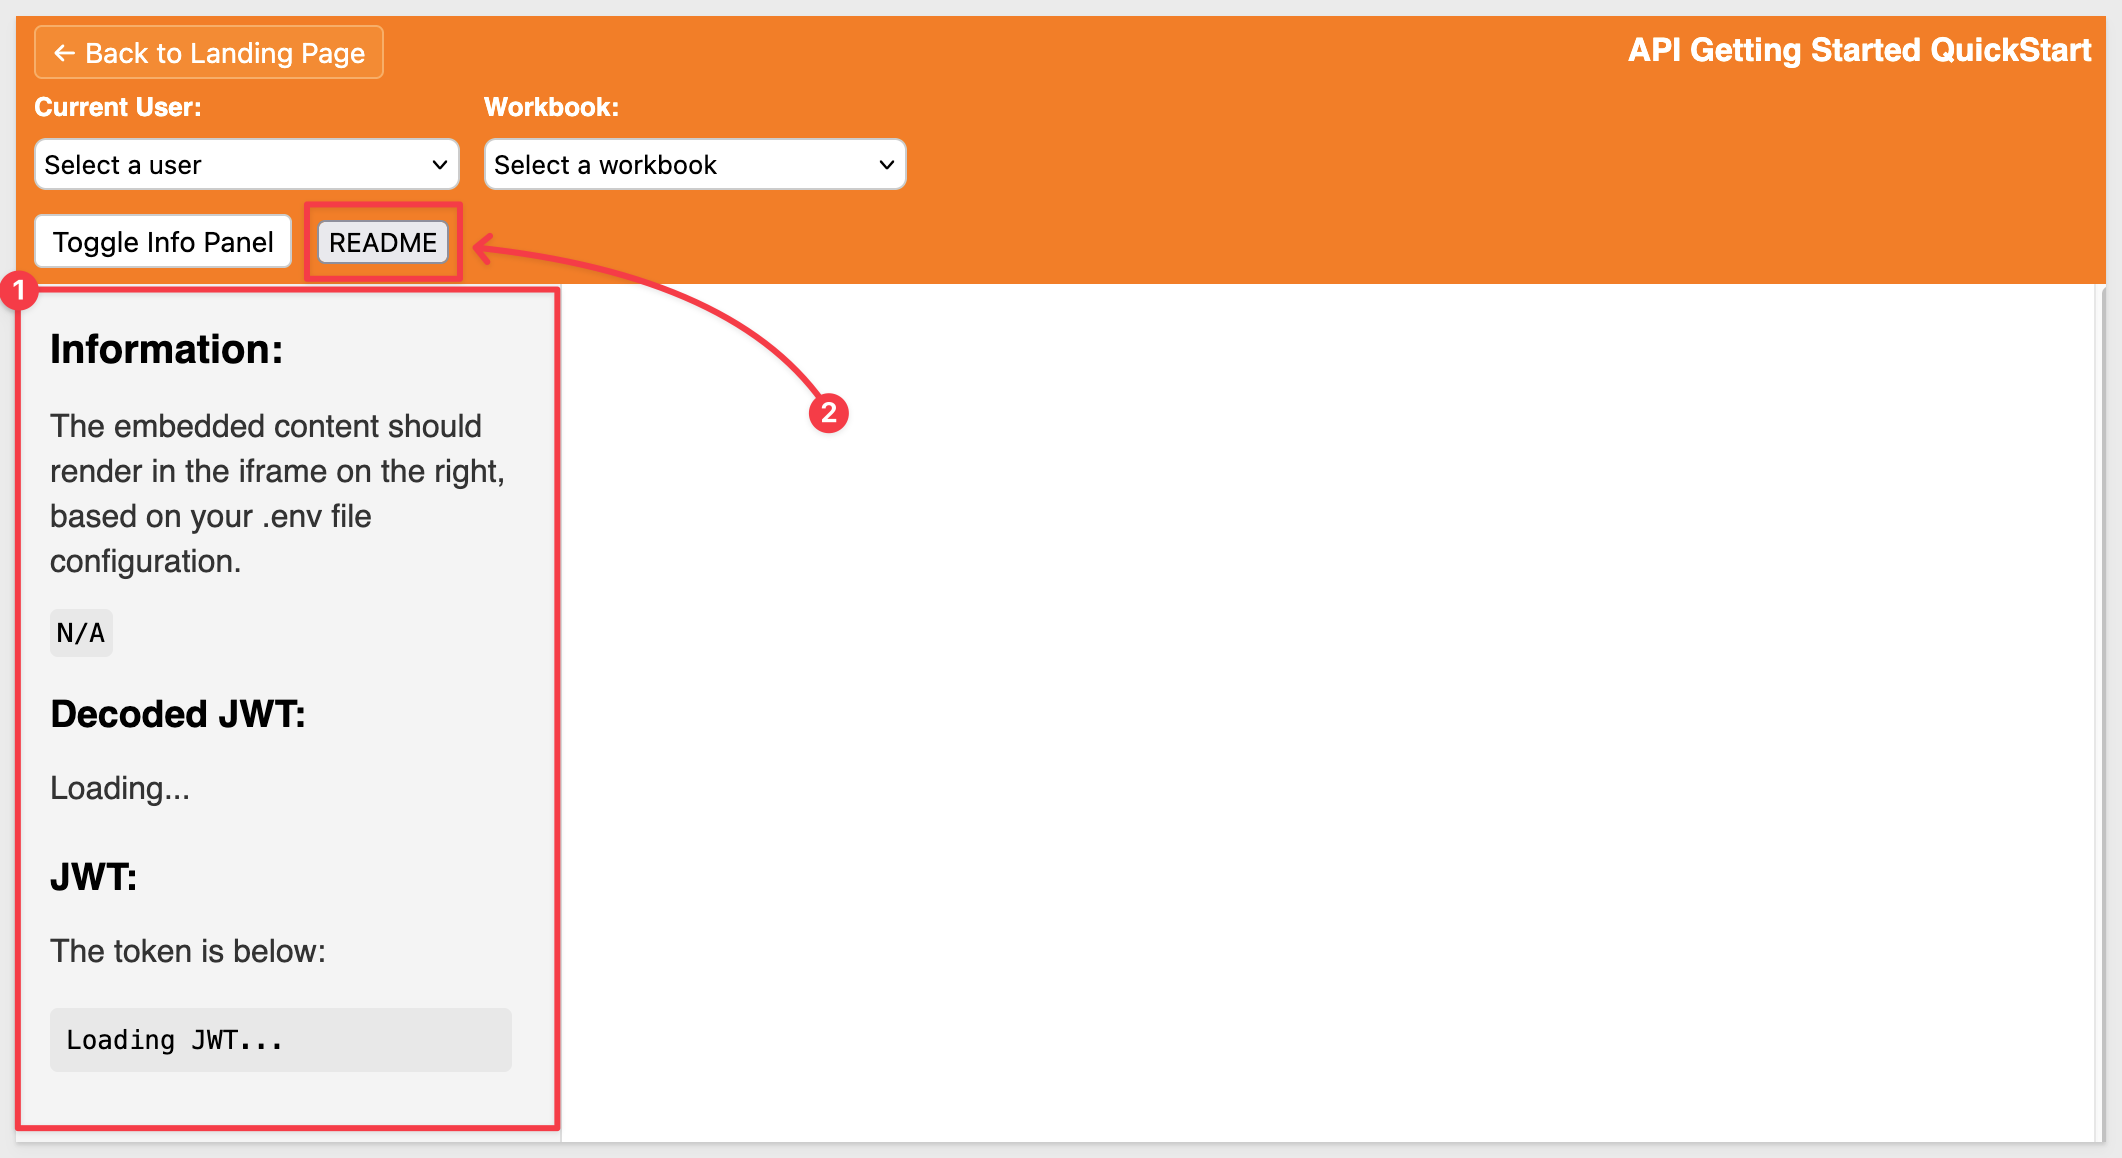
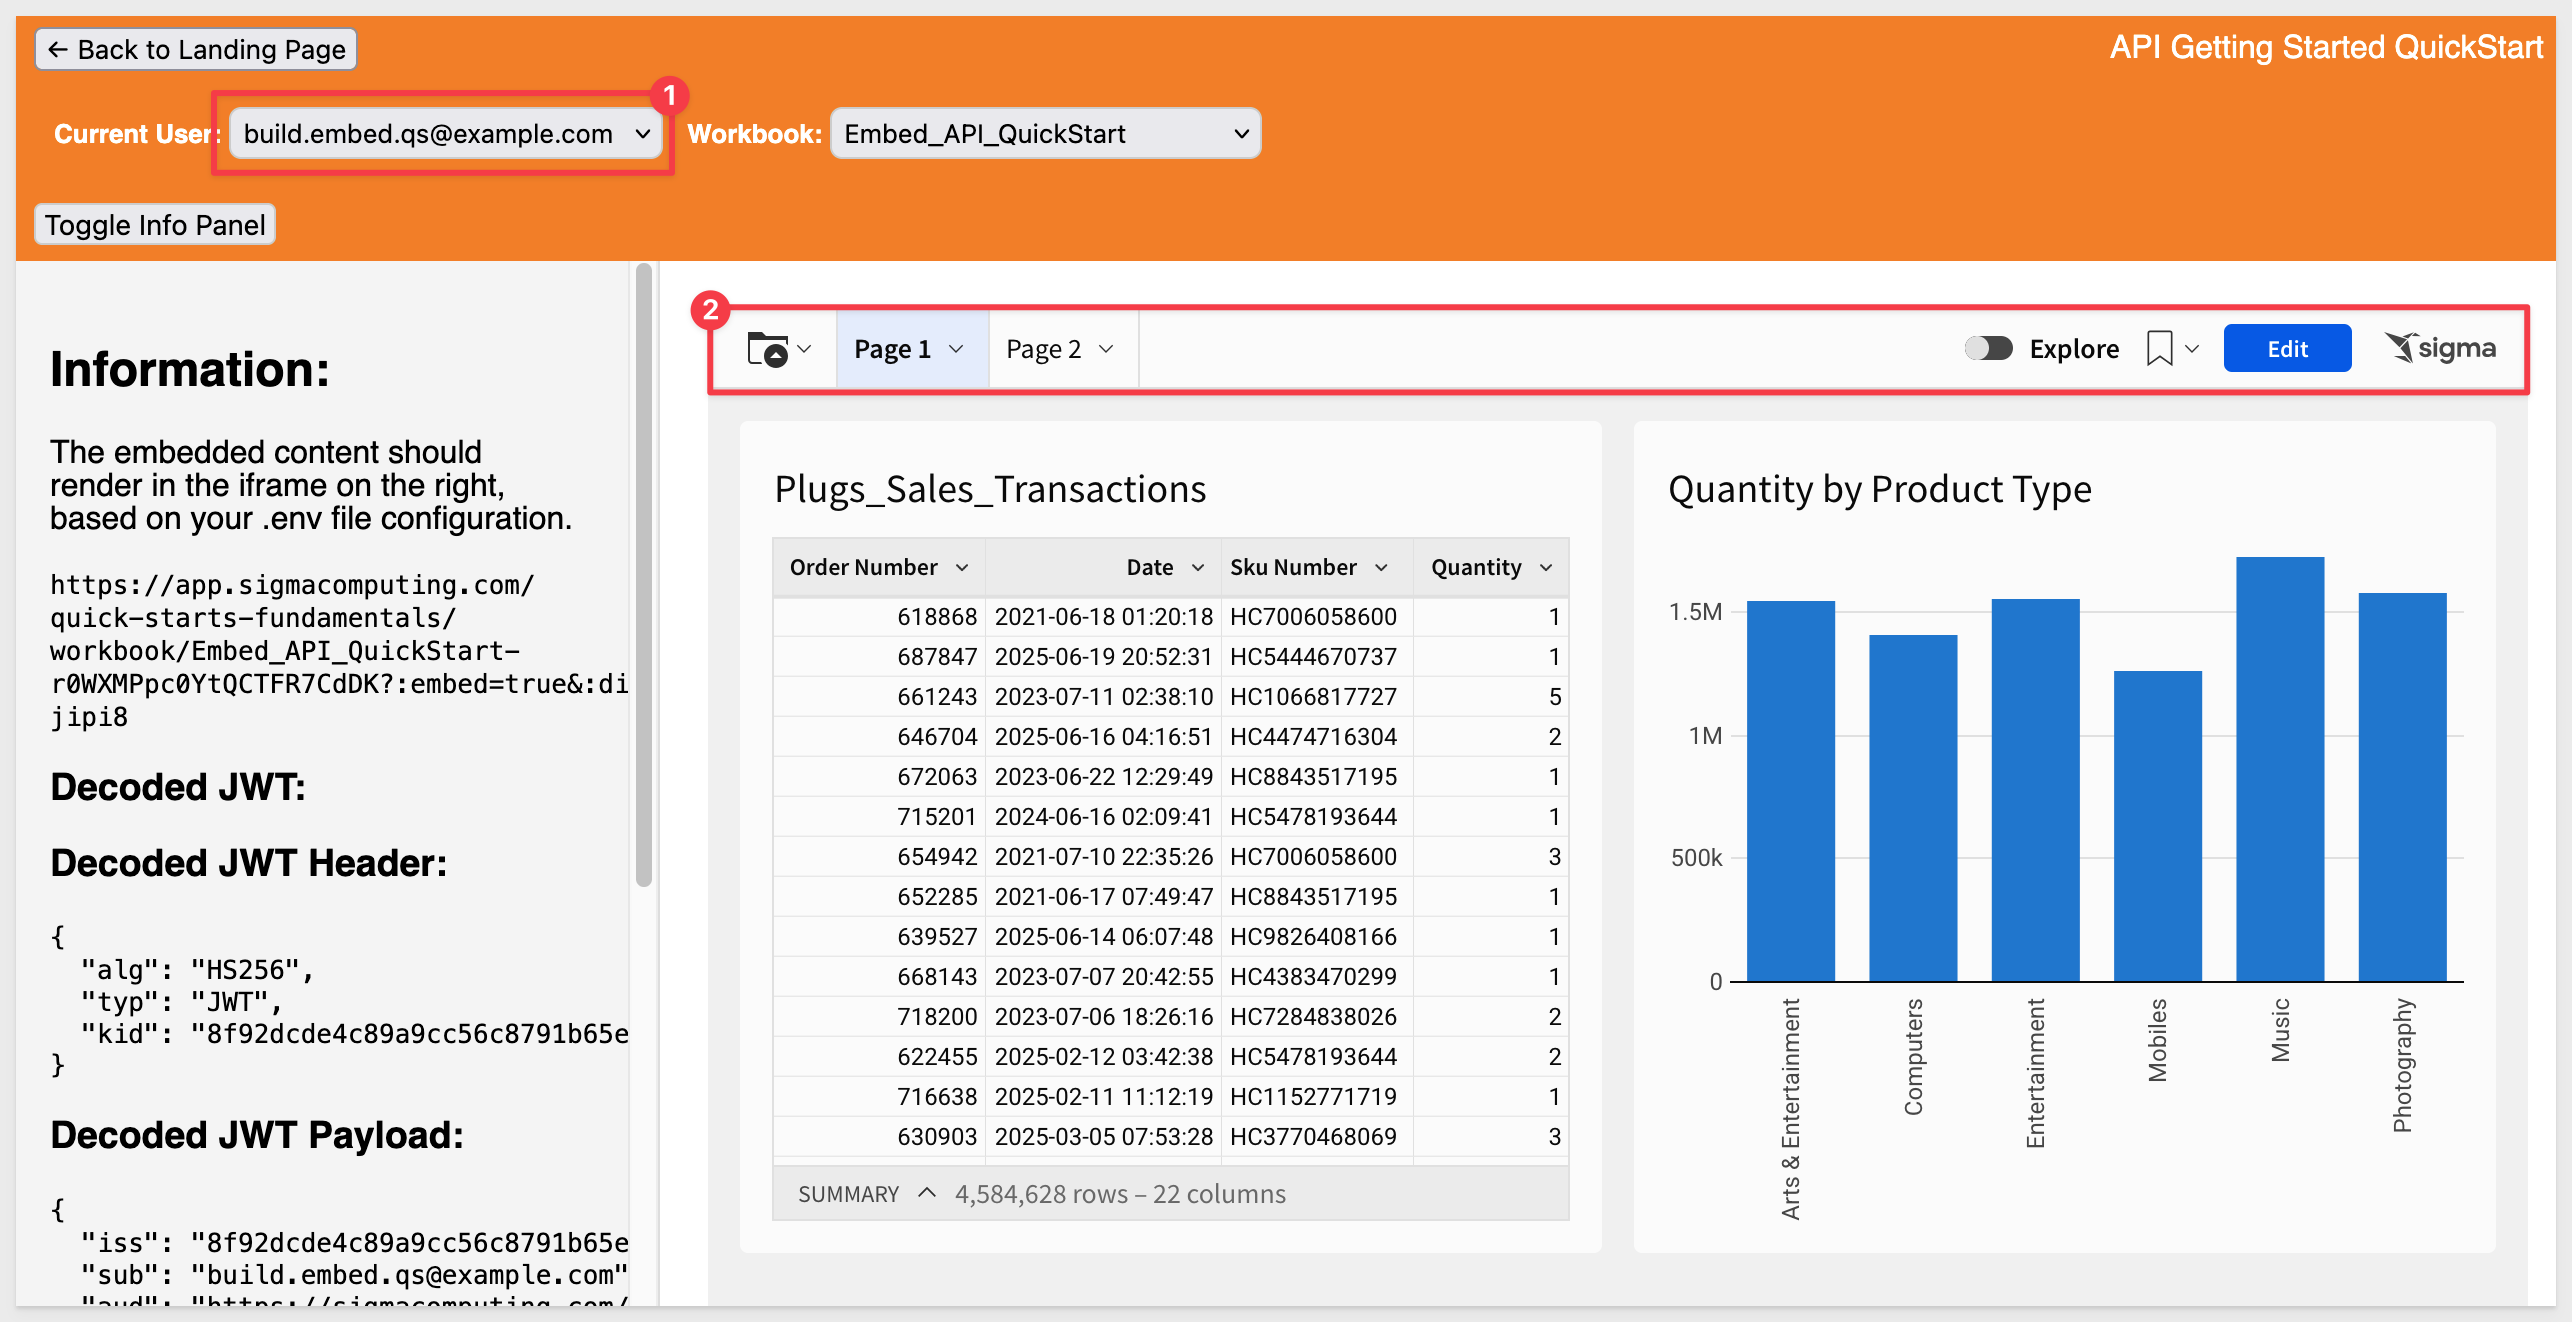
The API Getting Started page comes with a side-panel that displays embedding and token details.
The actual token appears lower on the side panel for anyone who wants to validate it using a third-party site such as JWT.io.
There is also a README button, that provides detailed information about how the Getting Started page is constructed, endpoints users and other useful information:
You can select to operate as either embed user and also select from our test workbooks:
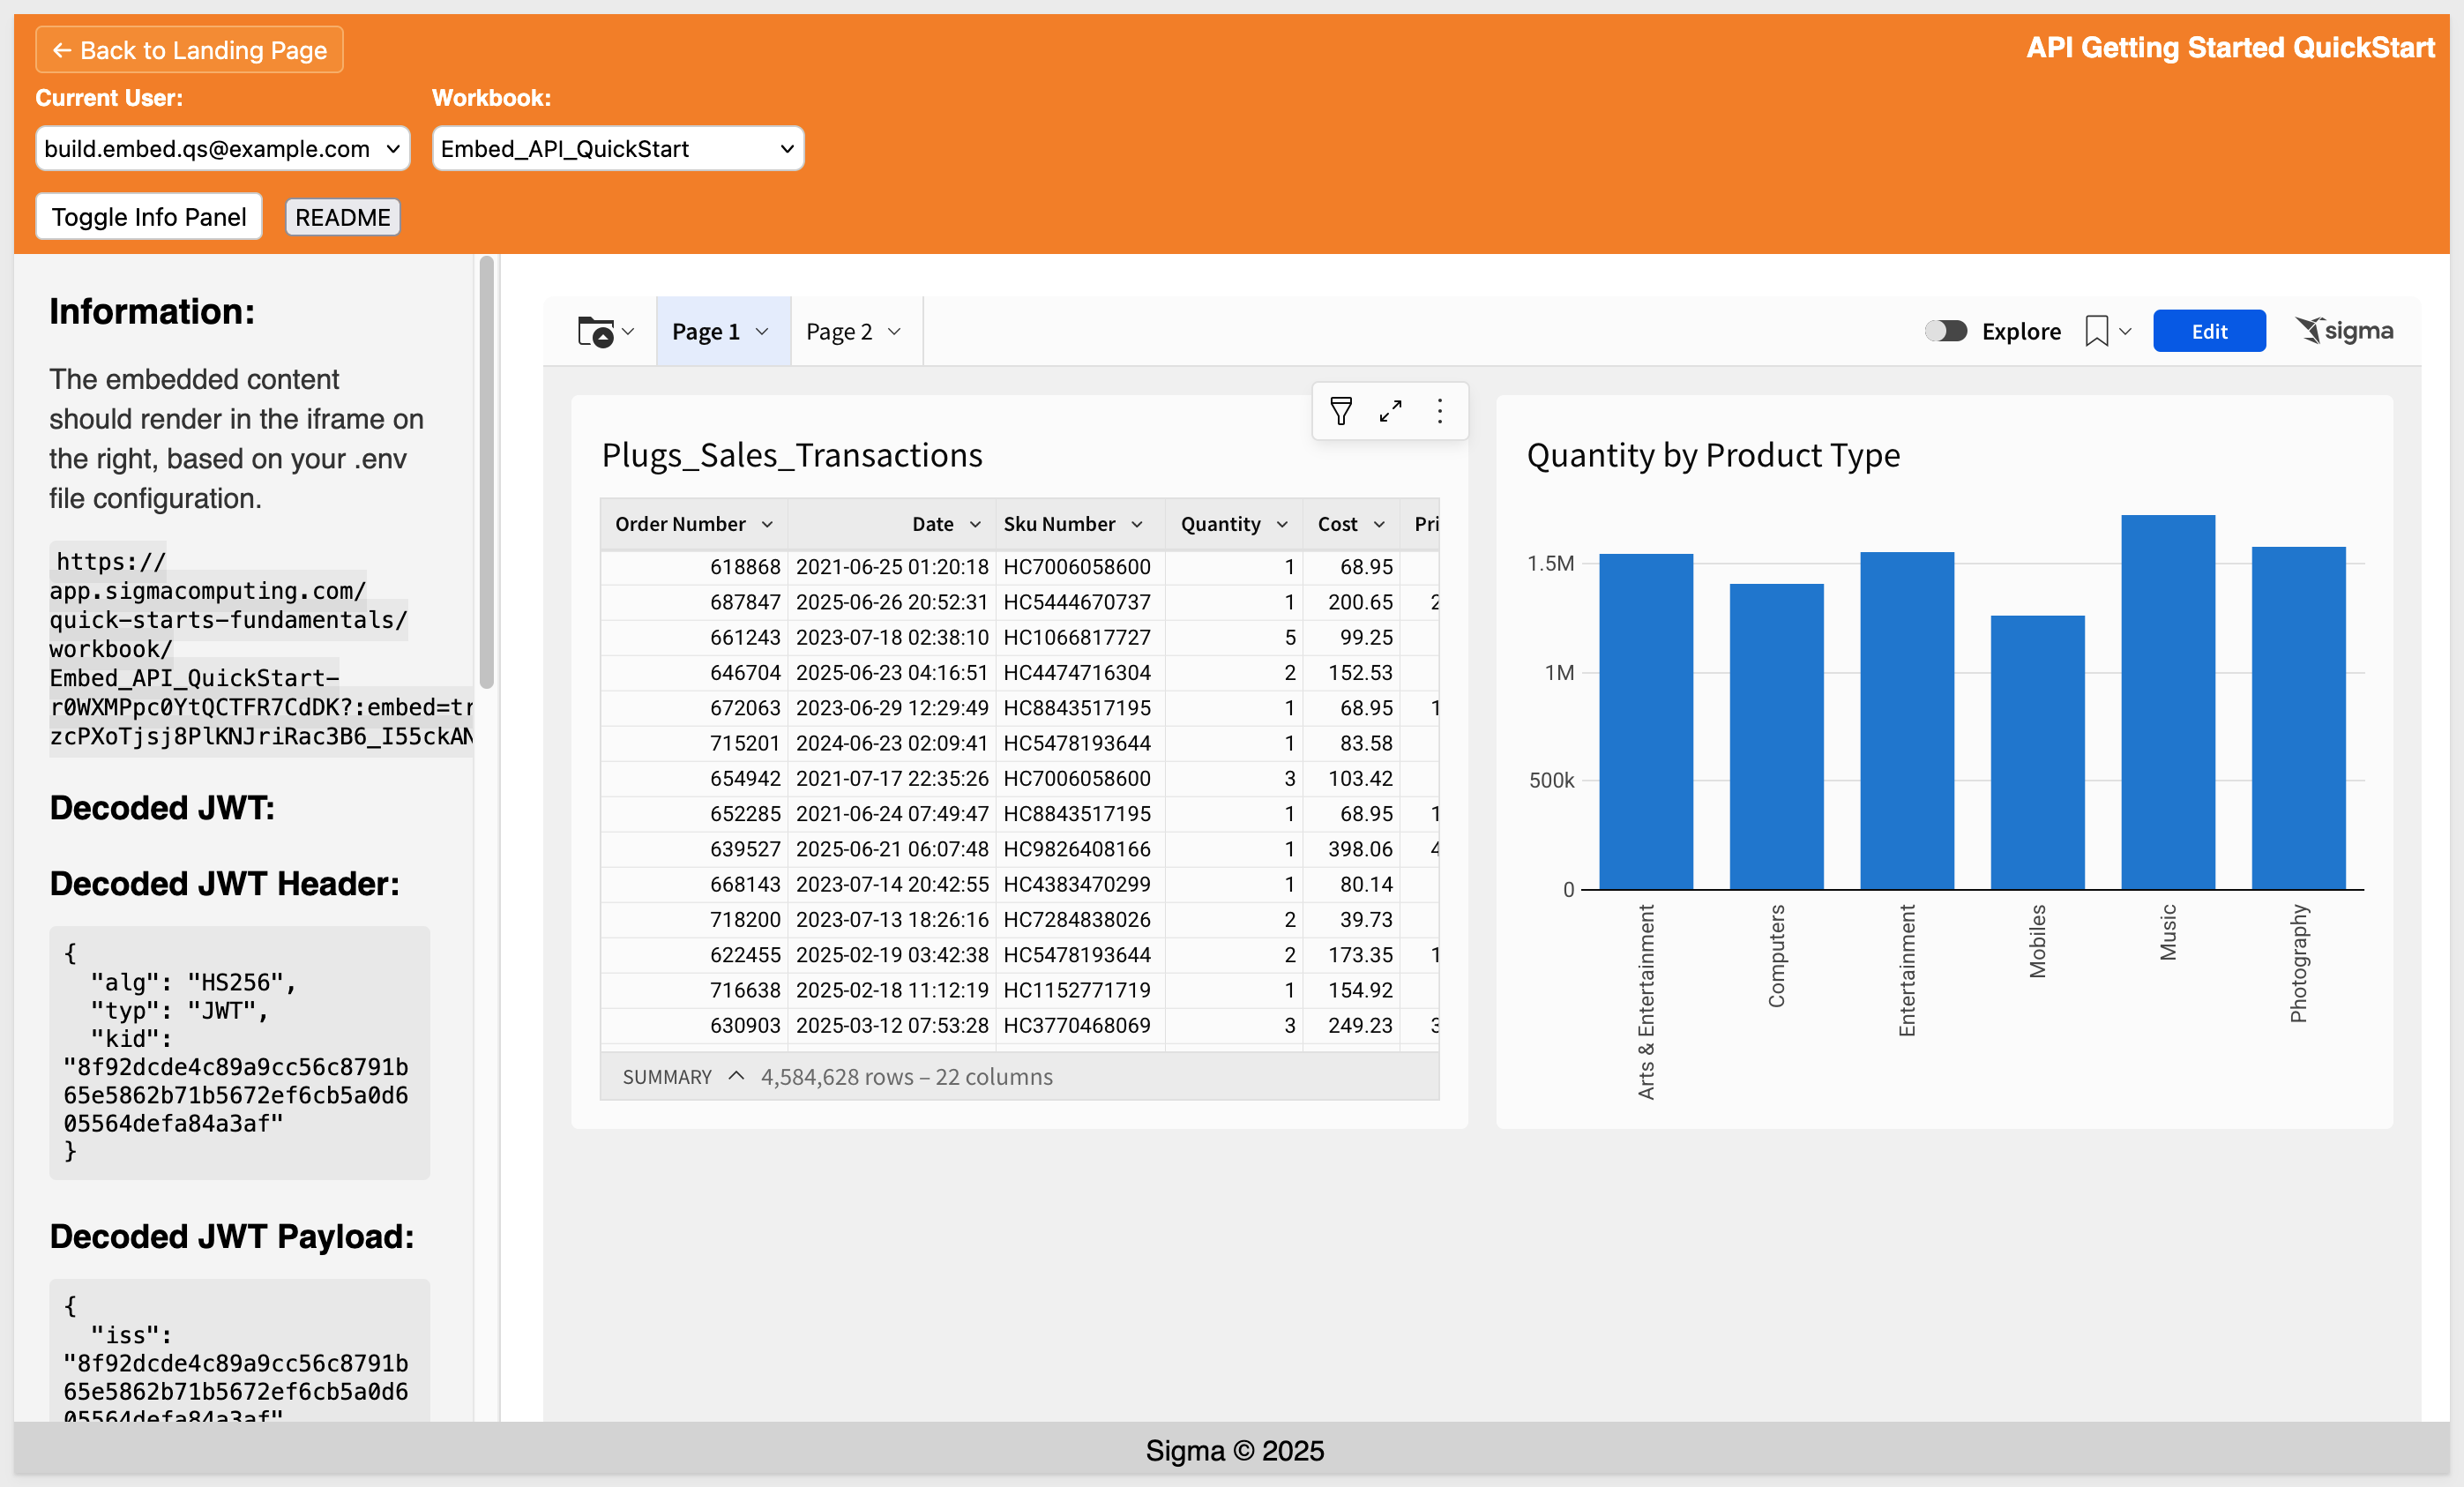
We have now successfully embedded Sigma into our host application and used the API to get information from Sigma (workbooks in the Embed_Users workspace) and passed the selected workbook back to Sigma using the correct format for a workbook embed:
Because we have debugging enabled, the terminal console displays logging output each time a page with an embed is reloaded:

Sigma supports different embed URL formats depending on the content type for different embeds in Sigma and this example constructs the correct format for embedding a workbook in the code.
For more information, see What URL to use
Enabling Menus and Folder Navigation for Build Users
We have designed the project to allow the Build user to see the Sigma menu and folder navigation, placing them at the top of the embed:
This was done to demonstrate a few of the optional runtime parameters that are available in the JWT embed. All the parameters (at the time of this QuickStart) are included in the .env file.
To give the Build user access to Sigma's editing tools during embedding, we configure the JWT to include specific UI flags. These values are only applied when embedding an entire workbook (not a page or element):
{
  "hide_menu": "false",
  "menu_position": "top",
  "hide_folder_navigation": "false"
}
These settings ensure that:
- The menu bar is visible
- The menu appears at the top of the screen (instead of a side menu)
- The user can navigate folders within Sigma if allowed by their role
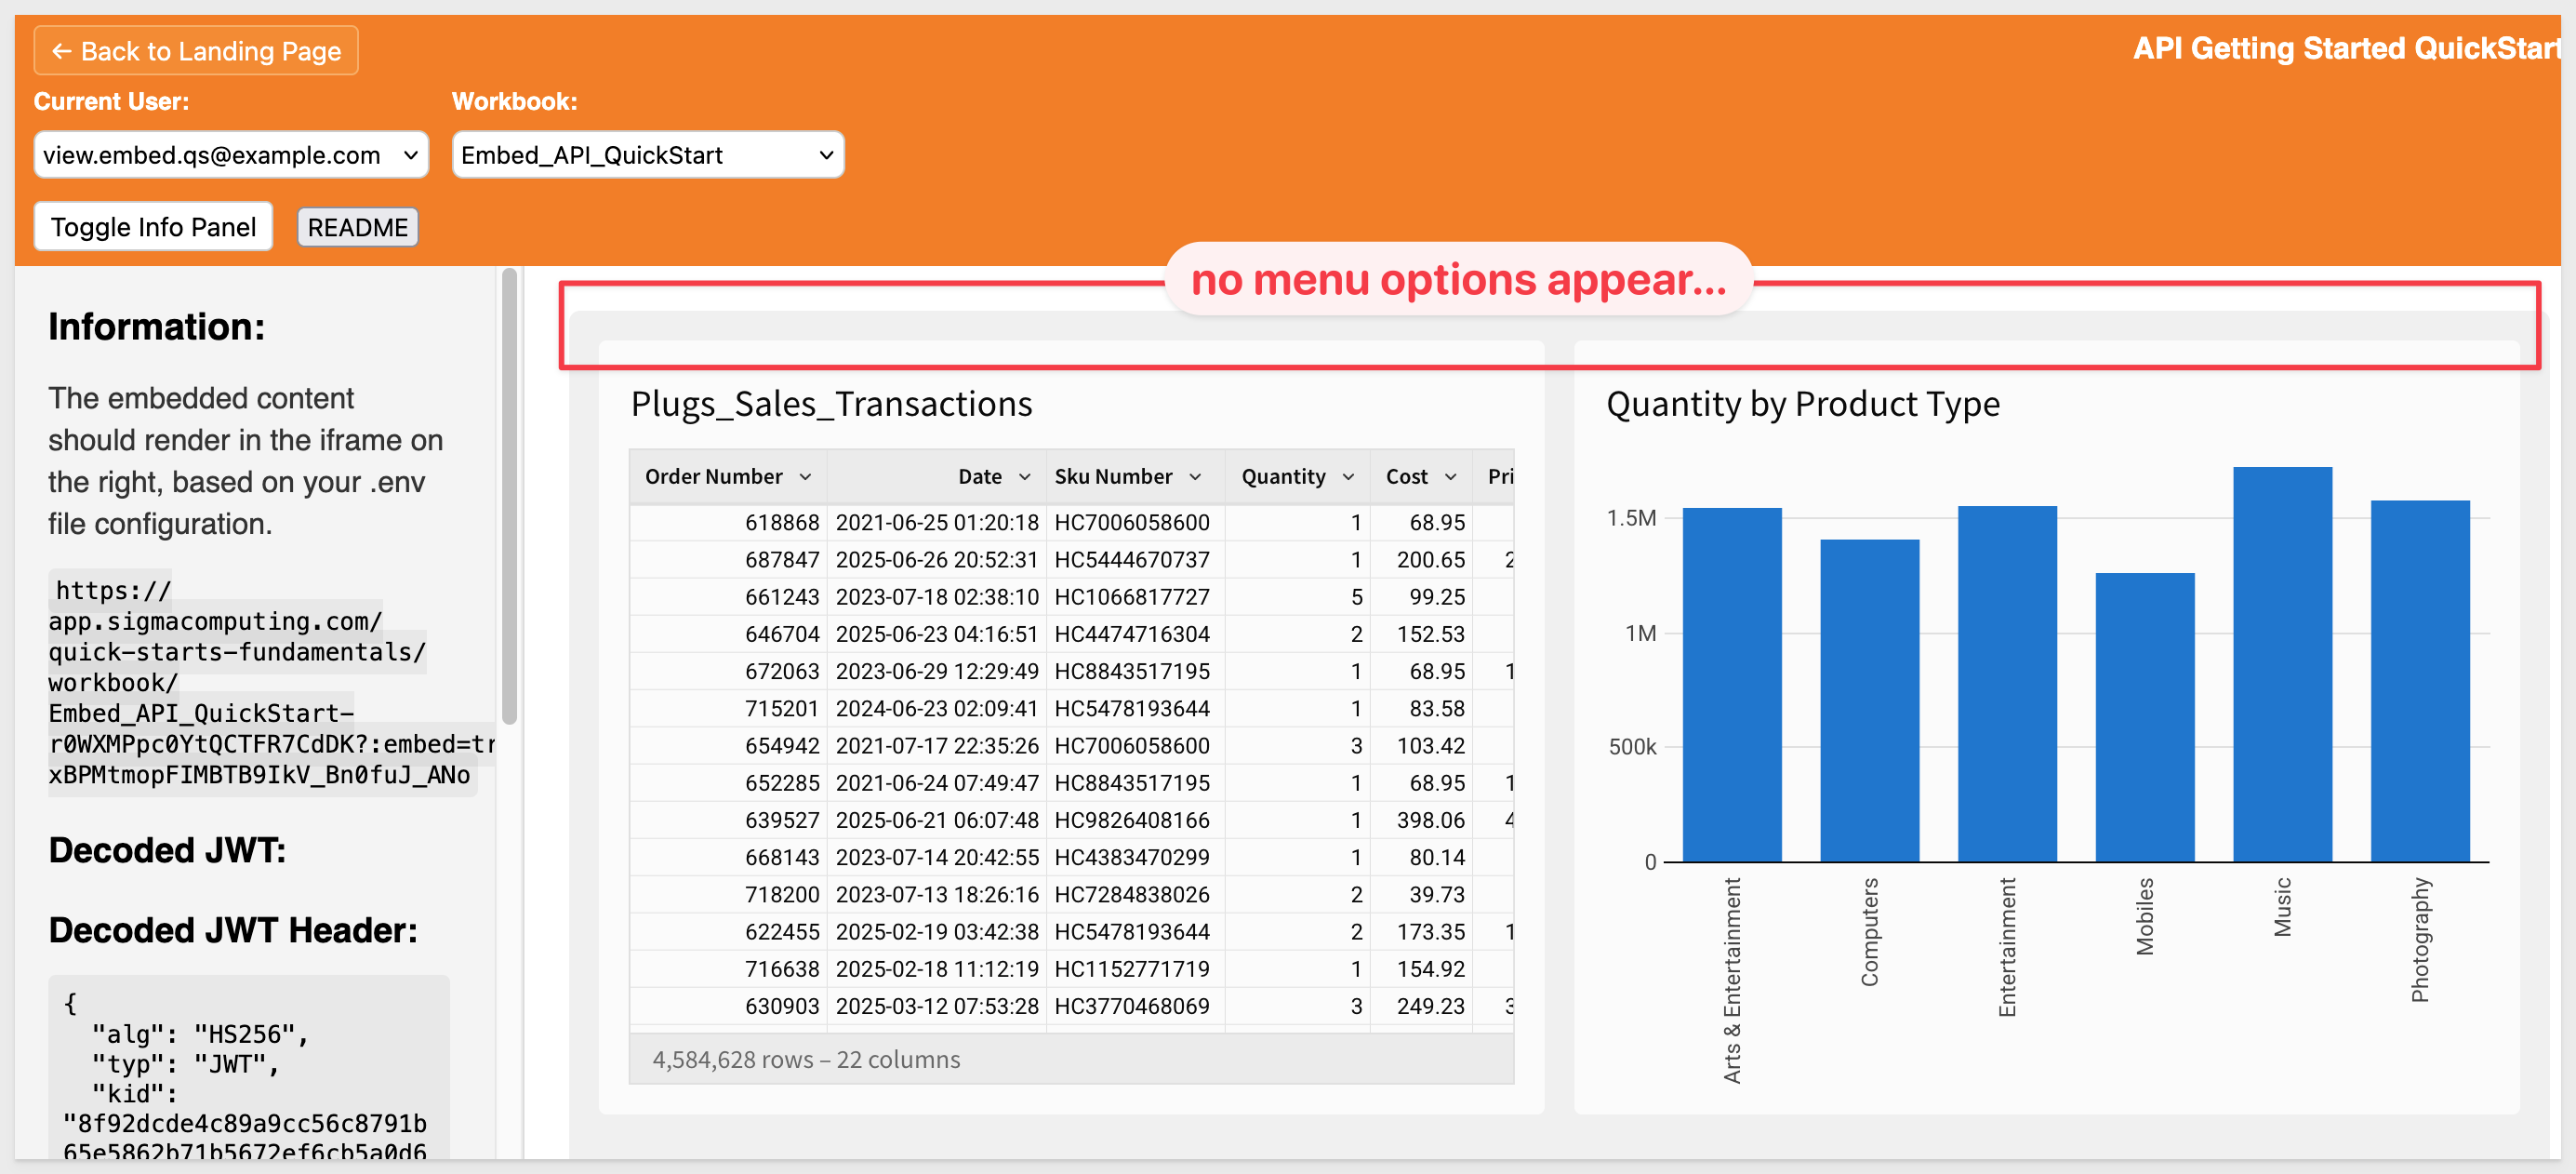
We apply these settings at runtime only if the selected user is a Build user. We intentionally enforce View users receiving a more restricted UI by default.
Selecting the View user, we can see the menu bar options are not included in the embed:
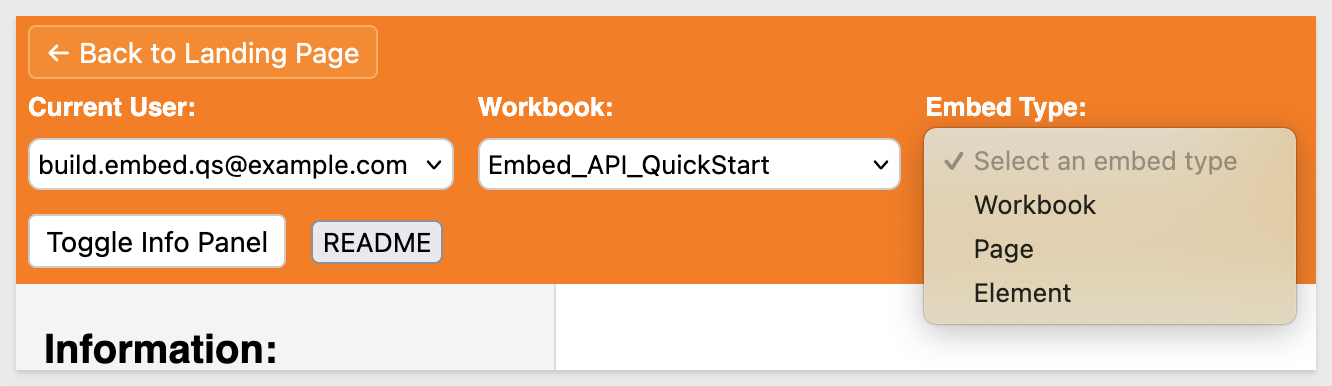
Return to the landing page and select Embed Controls and click Go.
This page extends the previous functionality to include an Embed Type selector. You can choose to select the workbook, page or element for the selected workbook.
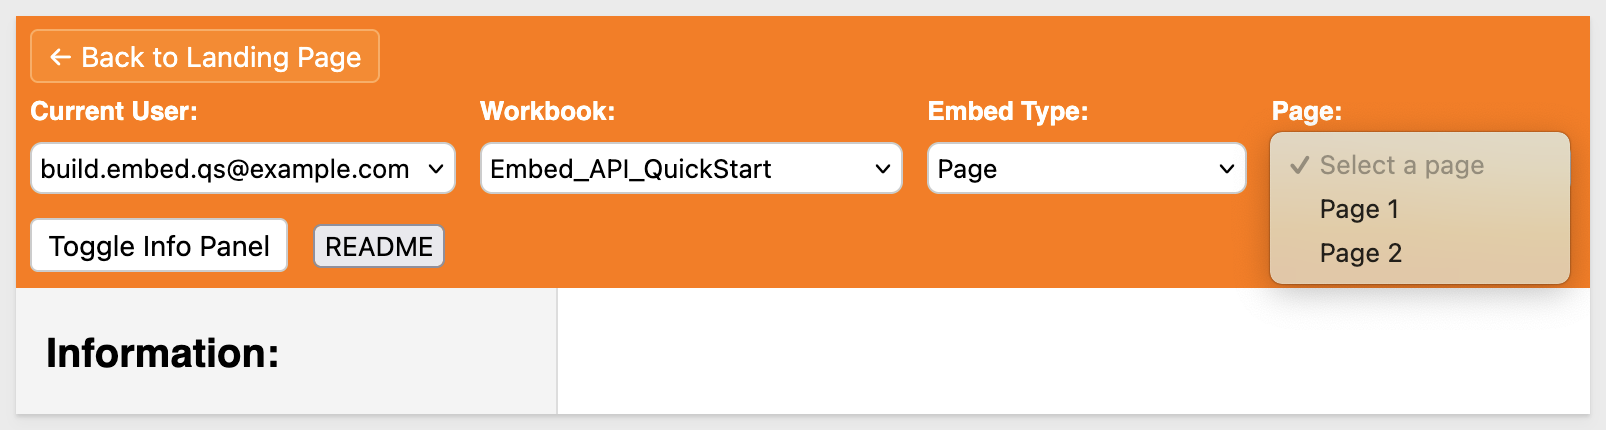
If we select Page, the host application will make an API call to Sigma to get the pages for the selected workbook:
Similarly, if Element is selected, the list of workbook elements is selected, you must first select a page before the list of workbook elements is retrieved:
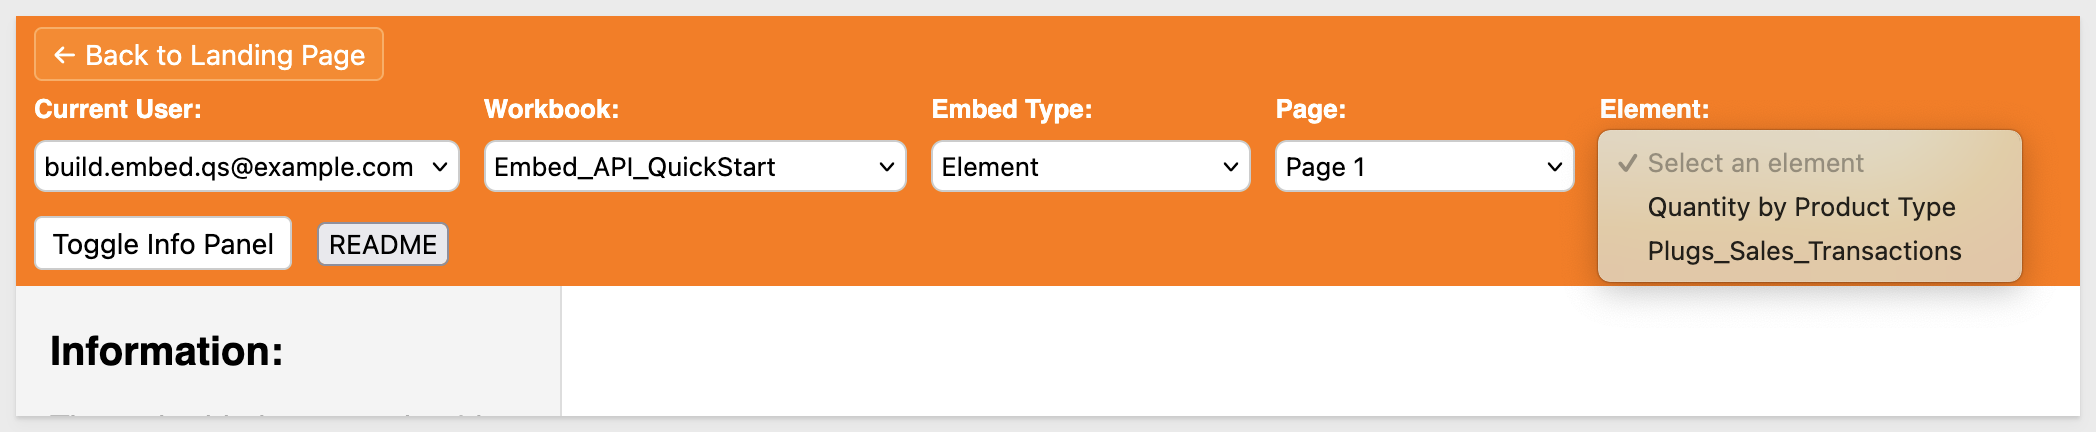
To avoid including workbook elements like Text the frontend JavaScript filters the list to include only elements with a type of "visualization" or "table", which are the most commonly supported types for element-level embedding. This helps avoid cluttering the dropdown with non-embeddable or structural elements.
A single line of code handles this filtering:
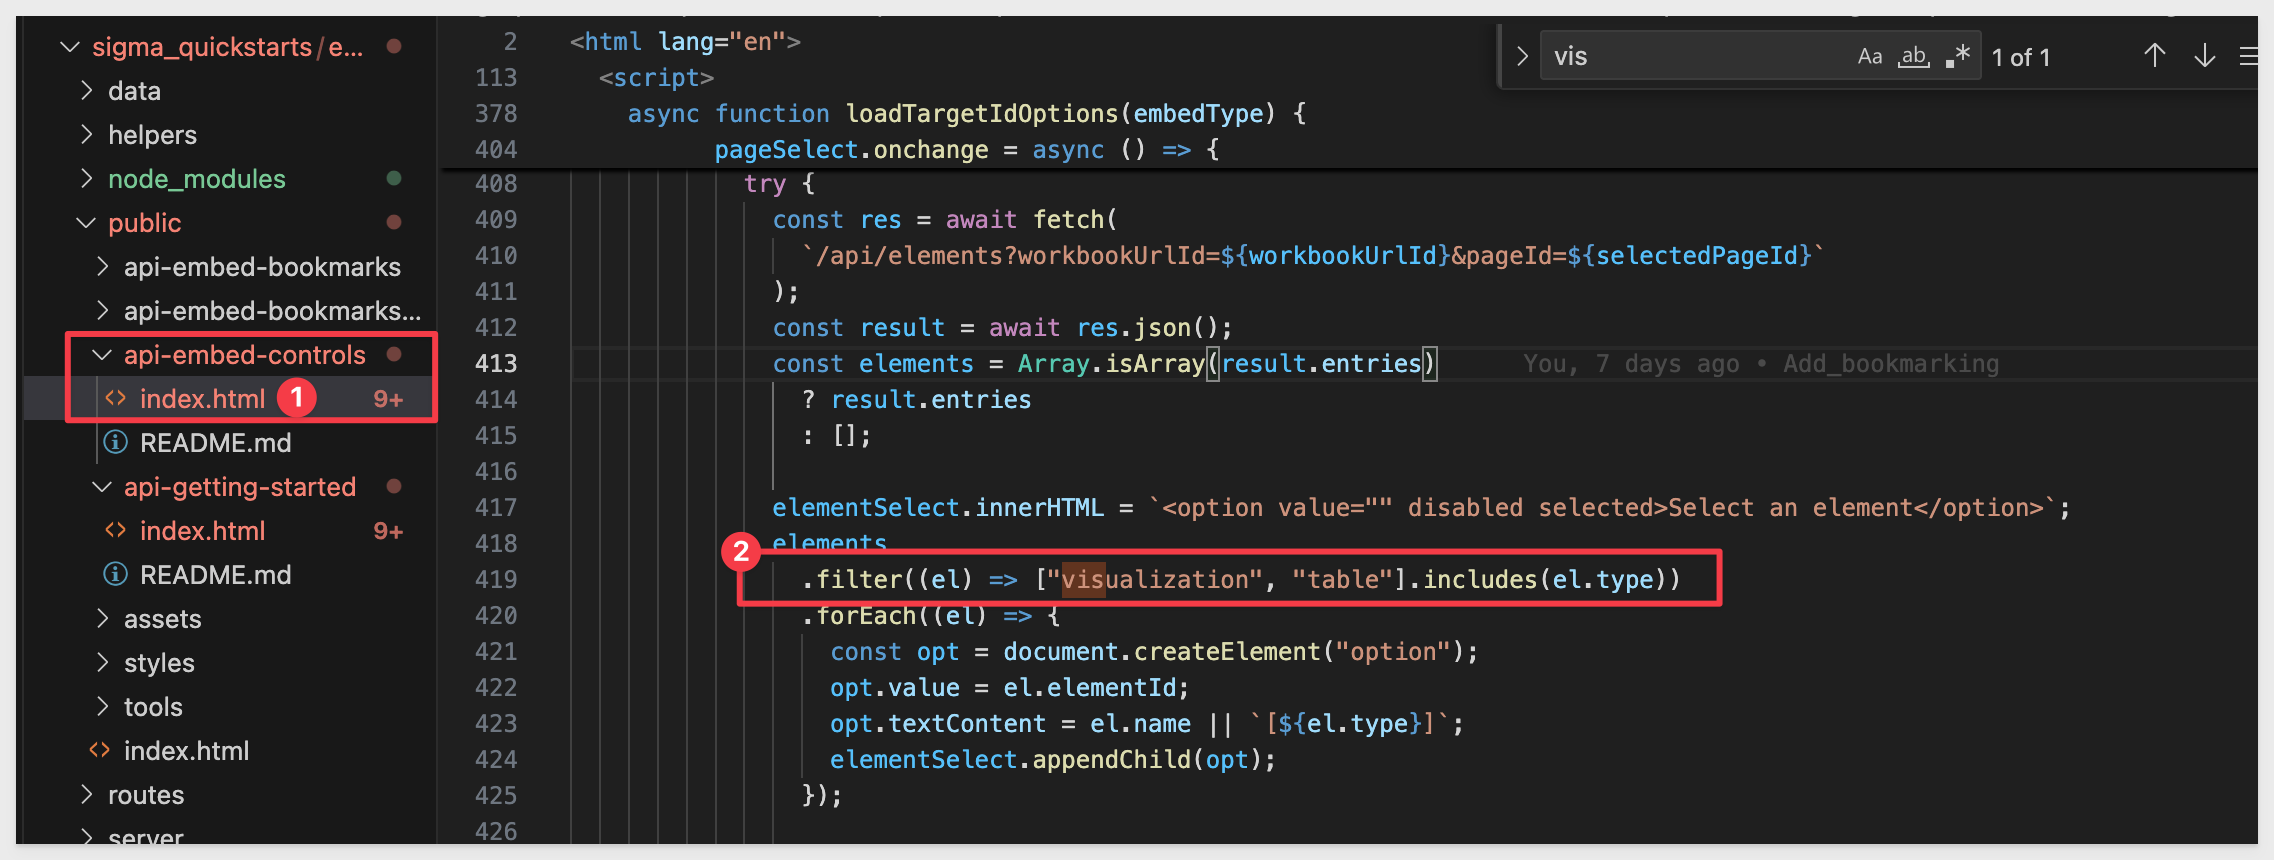
This dynamic behavior ensures the host application continues working even if Sigma content changes, listing and displaying any content that may have changed.
URL construction code
The construction of the Sigma embed URLs happens in the file helpers/build-embed-url.js.
It is responsible for constructing the embed URLs based on embedType, workbookUrlId, and optional targetId.
The customization is done here:
  let path;
  if (embedType === "workbook") {
    if (!workbookName) throw new Error("Missing workbookName for workbook embed");
    path = `/workbook/${workbookName}-${workbookUrlId}`;
  } else if (embedType === "page") {
    if (!workbookName || !pageId) throw new Error("Missing workbookName or pageId for page embed");
    path = `/workbook/${workbookName}-${workbookUrlId}/page/${pageId}`;
  } else if (embedType === "element") {
    if (!workbookName || !pageId || !elementId)
      throw new Error("Missing required info for element embed");
    path = `/workbook/${workbookName}-${workbookUrlId}/element/${elementId}`;
  } else {
    throw new Error(`Unsupported embedType: ${embedType}`);
  }
This code block builds a URL path for embedding a Sigma workbook, page, or element based on the value of embedType.
let path;
Declares the variable that will store the constructed path.
If embedType === "workbook"
Requires workbookName.
Constructs a URL like: /workbook/{workbookName}-{workbookUrlId}
If embedType === "page"
Requires workbookName and pageId.
Constructs a URL like: /workbook/{workbookName}-{workbookUrlId}/page/{pageId}
If embedType === "element"
Requires workbookName, pageId, and elementId.
Constructs a URL like: /workbook/{workbookName}-{workbookUrlId}/element/{elementId}
Else (unsupported embedType)
Throws an error indicating the value is not supported.
For additional information about the Embed Controls project files, refer to the readme using the button or browse to:
http://localhost:3000/api-embed-controls/README.md
In this QuickStart, we built a working host application that embeds Sigma using the REST API.
We demonstrated how to create or look up embed users and assign them to teams using the /v2/members and /v2/teams endpoints.
We also covered how to fetch available workbooks from /v2/workbooks, filter them for use in the embedding experience, and retrieve workbook structure — including pages and embeddable elements — using /v2/workbooks/{id}.
We also introduced optional parameters that adjust the embed behavior based on the selected user type (Build vs View), allowing different capabilities to be shown in the embedded experience.
Finally, we showed how to dynamically generate embed URLs for workbooks, pages, and elements based on user selections.
This foundation enables flexible, API-driven control of the Sigma embedding experience — including support for tiered access models.
Additional Resource Links
Blog
Community
Help Center
QuickStarts
Be sure to check out all the latest developments at Sigma's First Friday Feature page!


